
Automate Product Reviews Using Feedback Requester
On Amazon, reviews can be the difference between a best-seller and a product that gets overlooked. They build trust, help your listings stand out, and turn shoppers into customers. The problem? Getting reviews isn't always simple- you have to follow Amazon's rules and adopt the right approach. That's why we built our Feedback Request feature. It makes asking for reviews easy, effective, and customer-friendly, so you can focus on growing your business.
Note: This feature is currently in beta. If you run into a bug, please report it to our support team.
To use this feature, click Feedback Requester from the left menu.

Campaigns Tab
Create targeted email campaigns by product (all SKUs, specific SKUs, or exclude SKUs) and set delivery timing (e.g., X days after delivery).

New Campaign
To create a new campaign, click New Campaign.
Enter the name of the campaign.
To activate it right away, set the Status to Active.

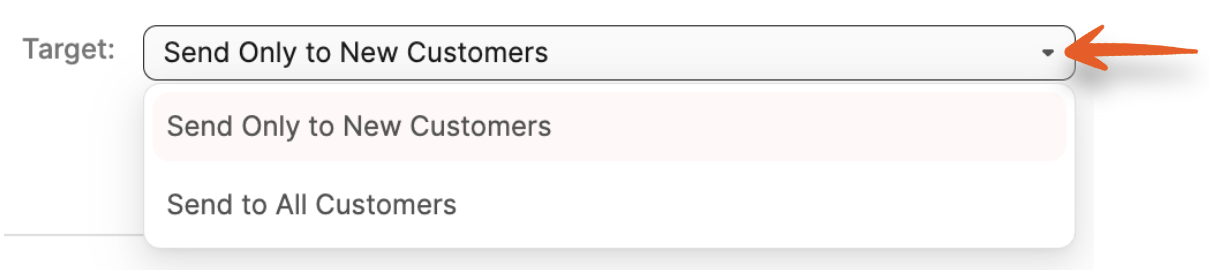
For the Target, select between the following options:
- Send Only to New Customers
- Send to All Customers
You can also use the radio buttons to exclude specific types of orders from receiving the feedback request.
- Exclude FBM Orders
- Exclude Orders With Promo
- Exclude Orders With Negative or Neutral Seller Feedback

Products
Use the radio buttons to set the campaign live for specific products.
- Apply Campaign To All Products
- Apply Campaign To The Selected Products
- Apply Campaign To All Products Except the Selected

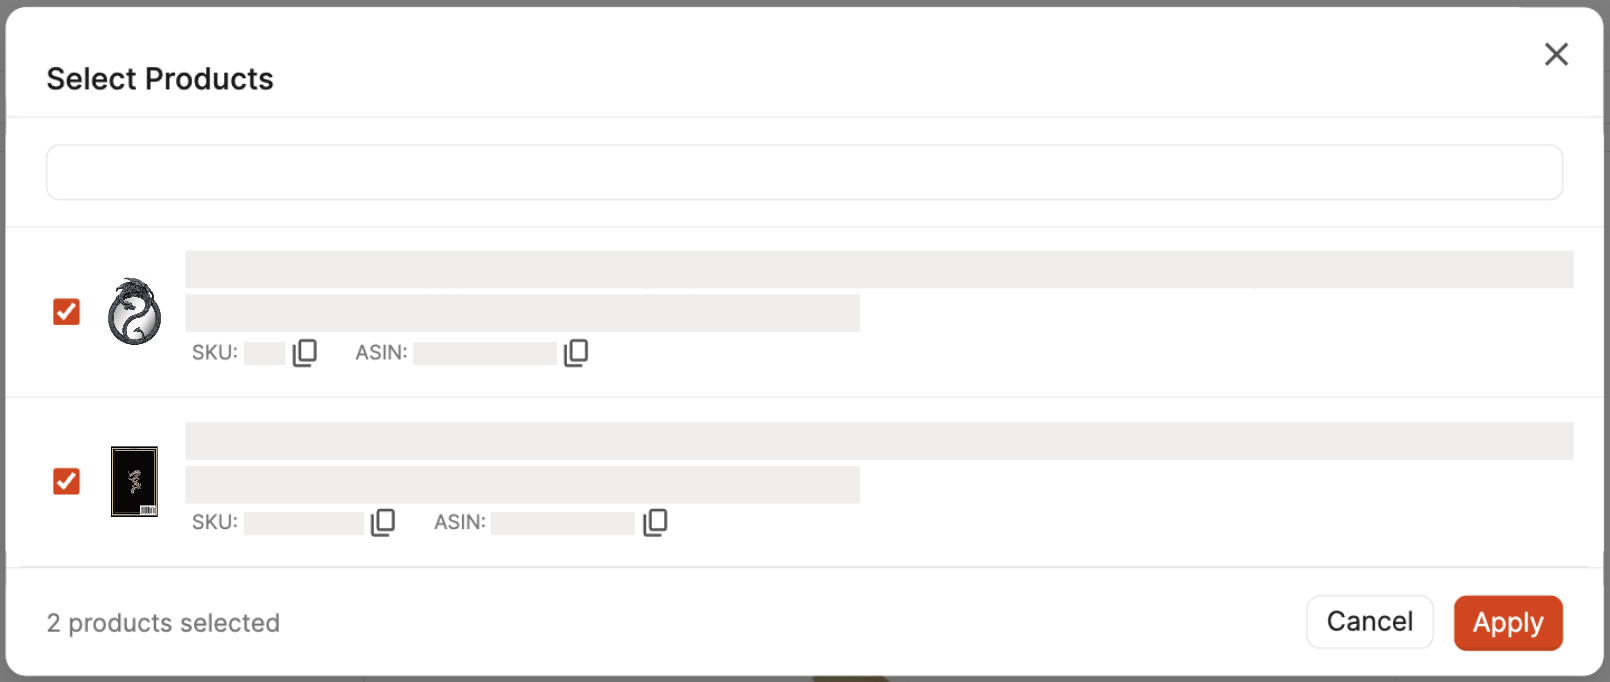
If you choose to apply it to selected products or all products except the selected ones, click Select Products to open a modal where you can search your inventory to choose the desired products.

Message Templates
For the Campaign Type, choose between a default template or build custom templates using the Rich Text Editor.

The Amazon Default type is already set up for you using Amazon's template for collecting feedback.
If you prefer to create your own template, select Custom Email Text, then click Add New Template.

A modal will open where you'll set up the template.
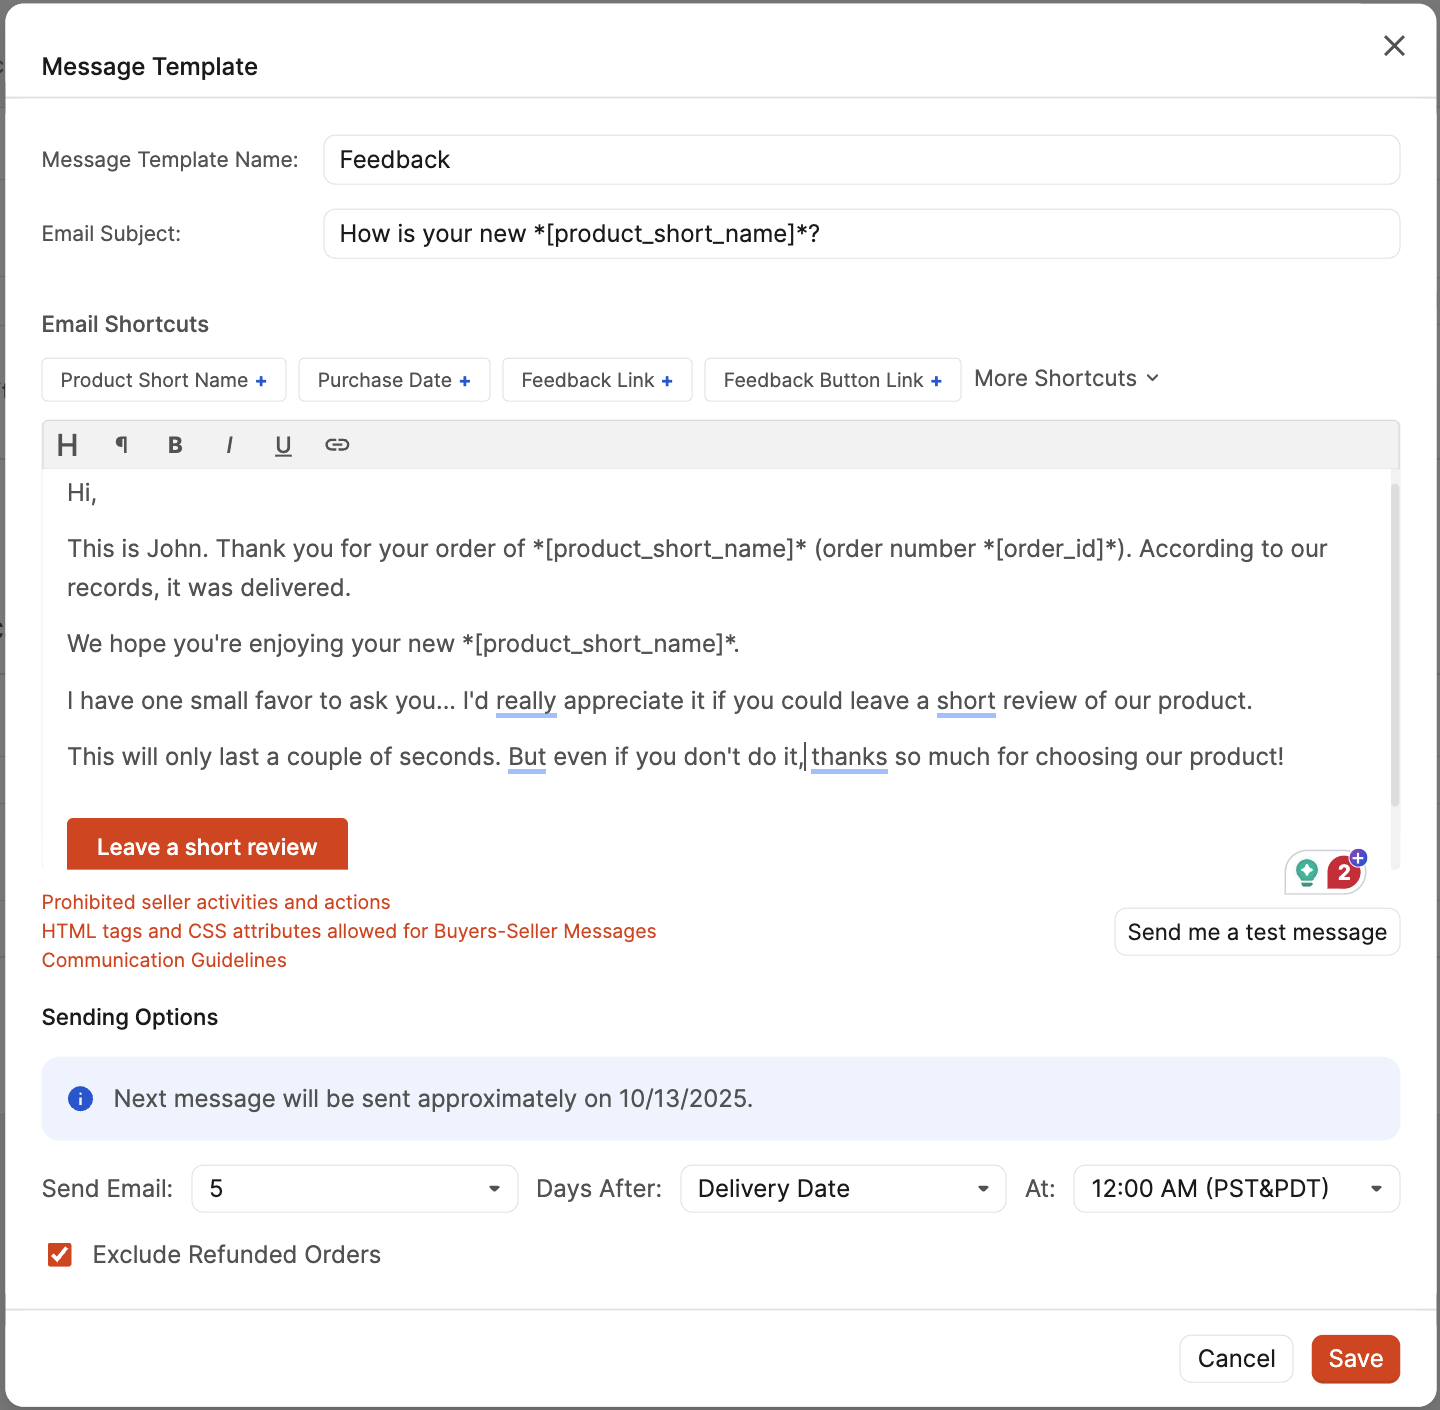
Enter the Message Template Name and the Email Subject.
Next, enter your custom message into the Rich Text Editor.
There are several Email Shortcuts you can use to fill in information and customize emails. For example, selecting the "Order ID" shortcut will automatically populate the customer's order ID in the email they receive. The shortcut options are:
- Product Short Name (These are set up on the Products tab)
- Purchase Date
- Feedback Link
- Feedback Button Link
- ASIN
- Carrier (FBA Only)
- City
- Contact Link
- Country
- Estimated Arrival (FBA Only)
- Order ID
- Product Link
To use a shortcut, click the one you want to use, and it will populate in the Rich Text Editor.

When creating a custom email template, it's essential to familiarize yourself with Amazon's guidelines for requesting feedback from customers. We recommend reviewing their related documentation linked below:
- Selling policies and seller code of conduct
- HTML tags and CSS attributes allowed for Buyer-Seller Messages
- Communication Guidelines
To preview how the email will appear when received, click Send me a test message to send a test to the email address associated with your Boxem account.
Sending Options
Click the Send Email field to choose the number of days to wait before sending a feedback request to customers.
Next, choose the desired date using the Days After field:
- Delivery Date
- Shipping Date
- Order Date
Then, use the At field to select the time for email delivery.
To prevent feedback requests from being sent to customers who have returned their orders, click the Exclude Refunded Orders checkbox.
Once you've made all your selections for the campaign, click Save.

Products Tab
On the Products tab, you can view the active campaign associated with each of your SKUs and add short names to personalize custom email content.
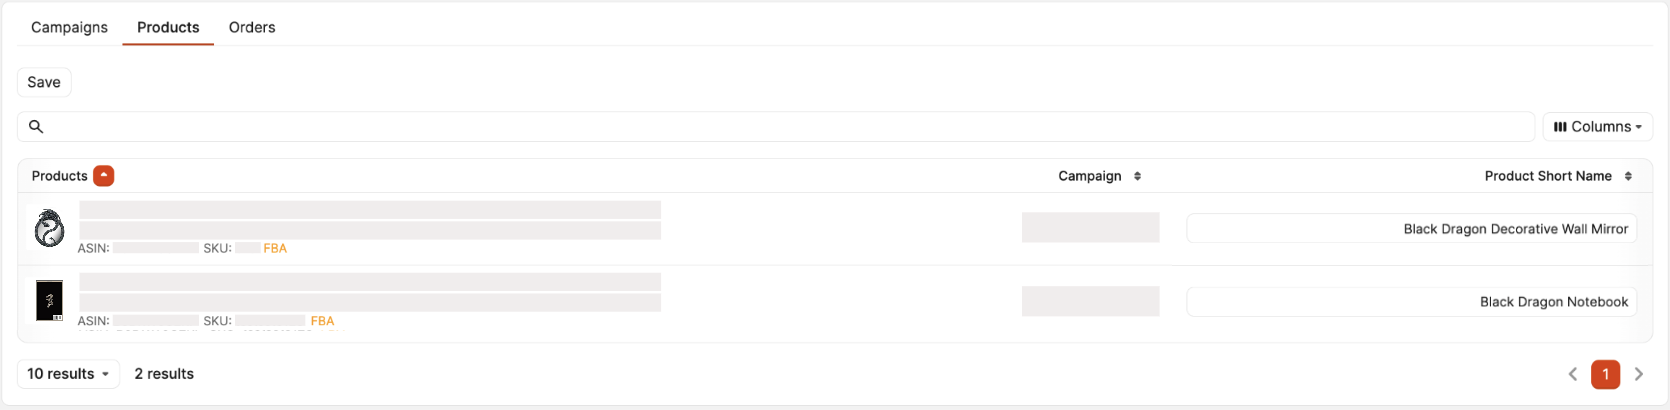
Pull up products by entering the product name, SKU, or ASIN into the search bar.
Choose the data shown by clicking the Columns button, then click the checkboxes next to the columns you'd like to see. The options are:
- Products
- Campaign
- Product Short Name
Each column is sortable by clicking the arrows next to the column name.
If an active campaign is assigned to a product, it will display in the Campaign column.
To personalize how the product title appears in custom email templates, you can enter short names into the Product Short Name fields.
After entering short names, be sure to click the Save button.
Orders Tab
You can trigger emails directly from the Orders tab and send emails to the customers on demand.

Pull up orders by entering the product name, SKU, FNSKU, ASIN, UPC, ISBN, EAN, or GTIN into the search bar.
You can also enter an Order ID directly into the Order ID bar.
To sort by Campaign, click the dropdown arrow to select a campaign.
Choose the data shown by clicking the Columns button, then click the checkboxes next to the columns you'd like to see. The options are:
- Product
- Campaign
- Status
- Order Date
- Shipping Date
- Delivery Date
- Order ID
- Last Sent Date
- Black Listed
- Actions
Clicking the vertical ellipsis in the Actions column opens a menu where you can click Send Review Request to trigger an email to the customer.
You can also add the order to the Blacklist to stop emails from being sent to customers for specific orders.
