
How to Create an Amazon Seller Account
Registering to sell on Amazon is a straightforward process, requiring just a bit of your time and a few necessary documents.
You'll find two selling plans: Individual and Professional. The Individual plan works for those selling fewer than 40 products per month, to which Amazon will apply a per-unit fee. The Professional plan, which comes with additional tools and benefits including access to Amazon's API, requires a monthly subscription of $39.99.
As we use Amazon's API to communicate with them as a third-party service, a Professional account is necessary to use Boxem.
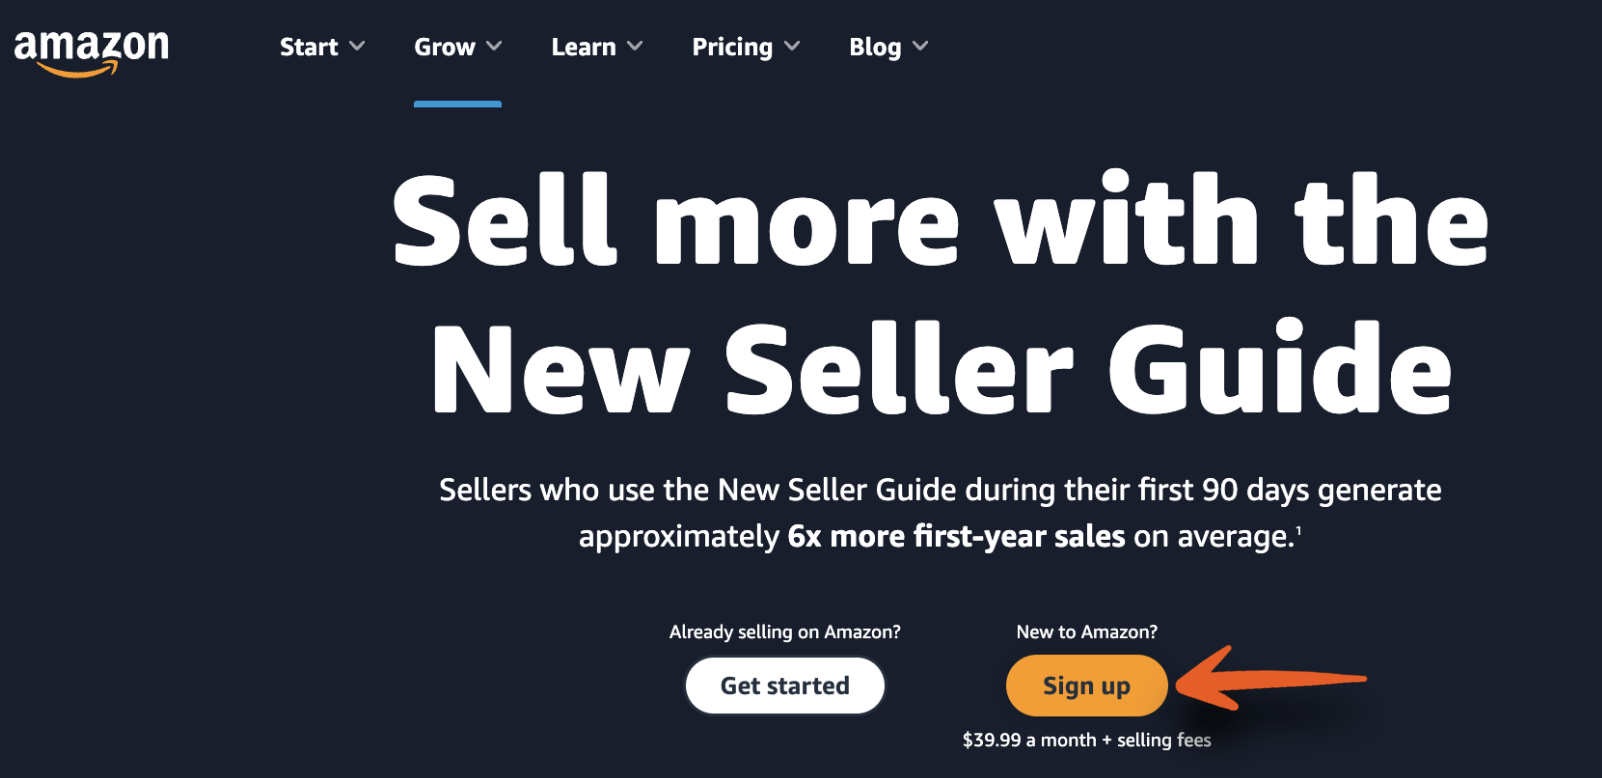
Start by visiting the Amazon Seller signup page and click Sign Up.
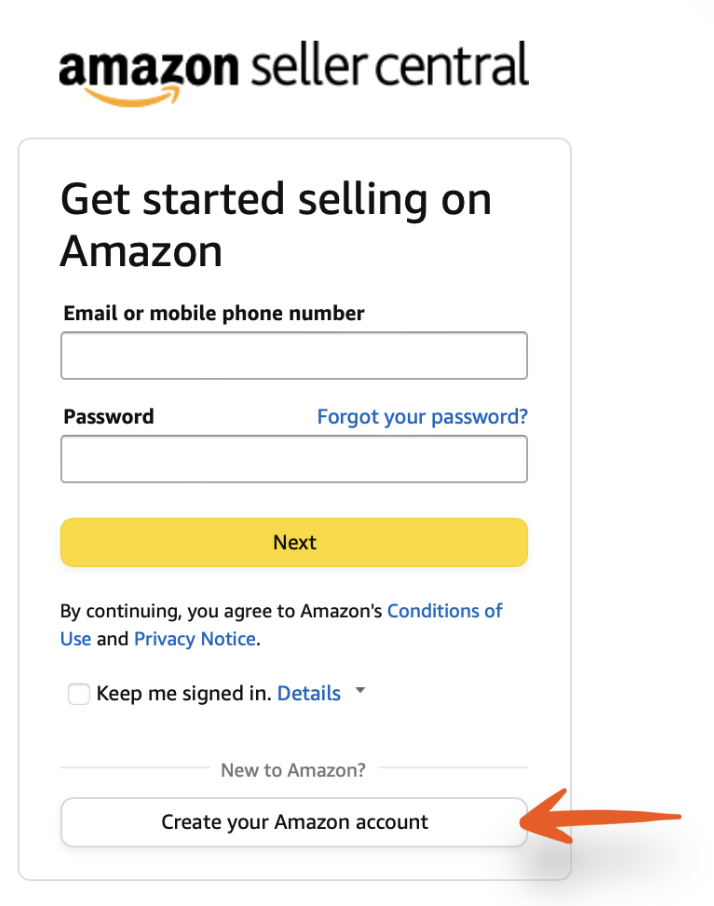
When the sign-in form appears, click Create your Amazon account.
When the sign-in form appears, click Create your Amazon account.
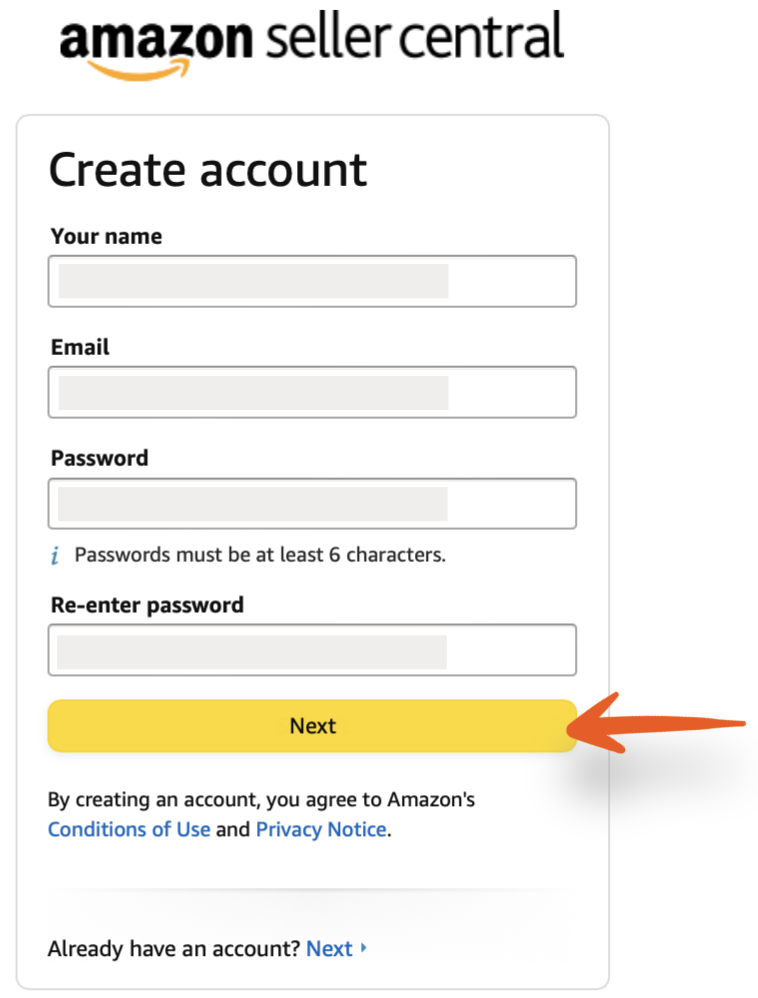
Enter your account details and click Next.
For security purposes, an OTP code will be sent to your email address. Enter this code to verify your email and proceed with the registration process.
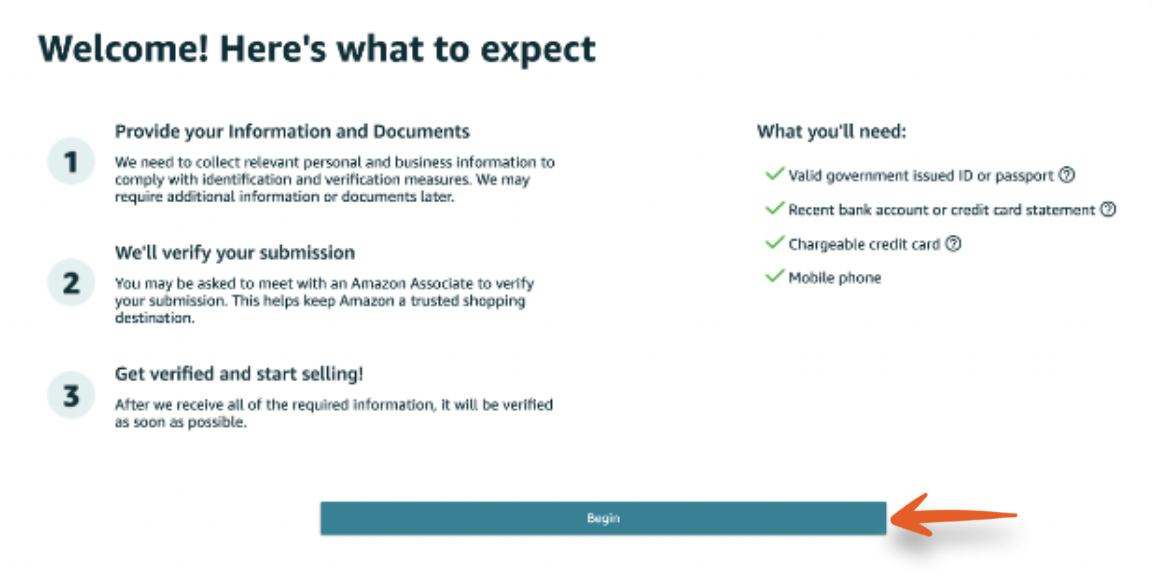
You'll be taken to a screen showing what you'll need handy to complete the registration:
- Valid government-issued ID or passport
- Recent bank account or credit card statement
- Chargeable credit card
- Mobile phone
Click Begin.
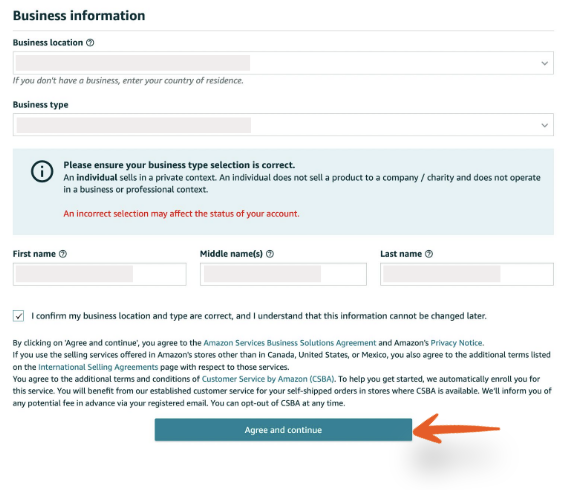
Next, choose the Business location and Business type.
For your Business location, choose the country where your business is located.
For your Business type, choose from the following options:
- State-owned business
- Publicly-owned business
- Privately-owned business
- Charity
- None, I am an individual
After selecting, Amazon will ask you to enter details about your business in the next step. If you still need to set up a business, choose None, I am in individual. Amazon will ask for your full name with this selection.
Click Agree and continue.
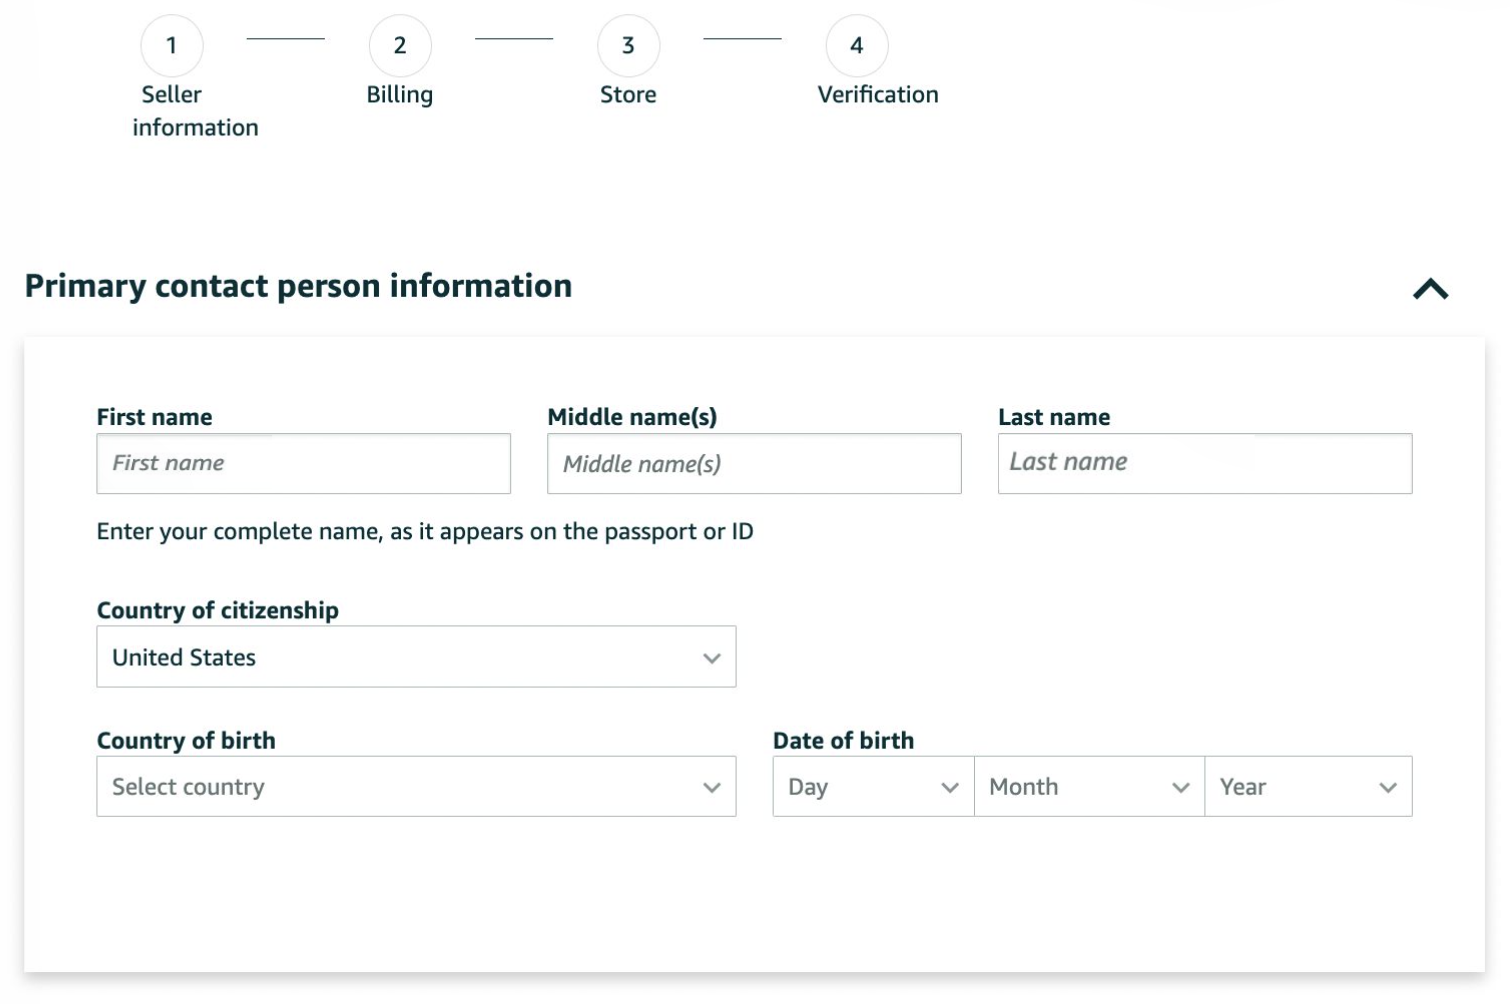
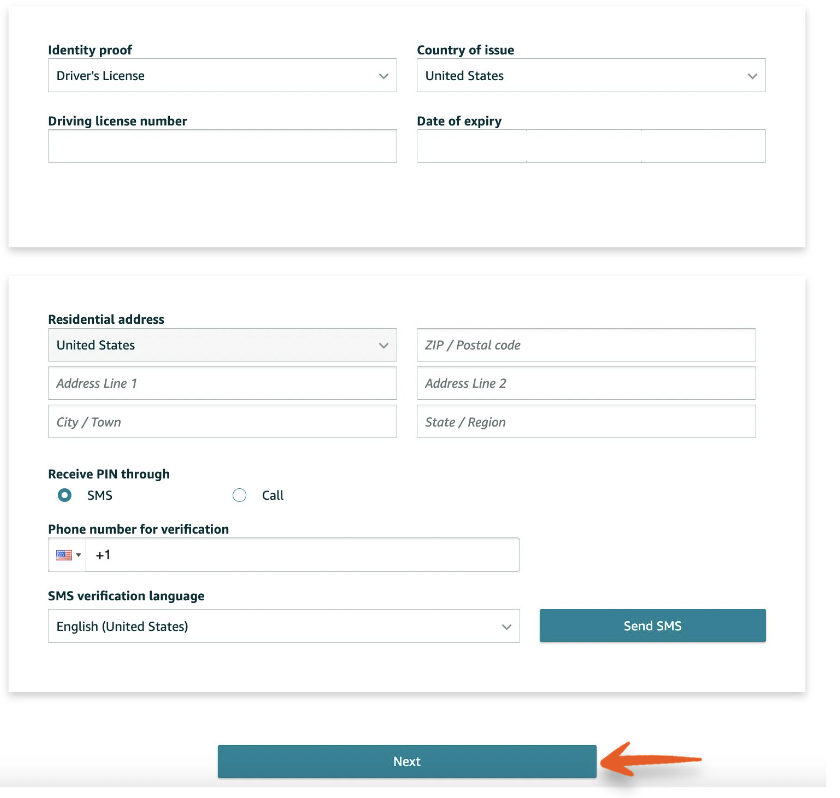
The next step is to provide your personal information, including a form of identification. You can either use your passport number or your driver's license.
You will then need to verify your phone number via text or call. Once you enter your Amazon PIN, your phone number will be verified.
Click Next.
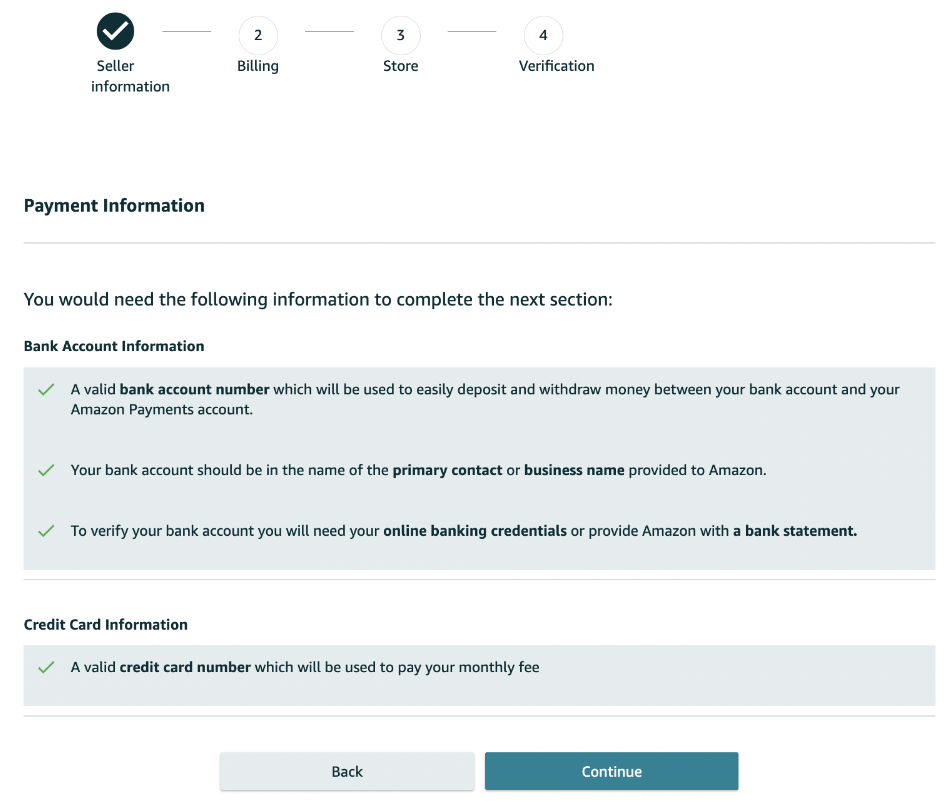
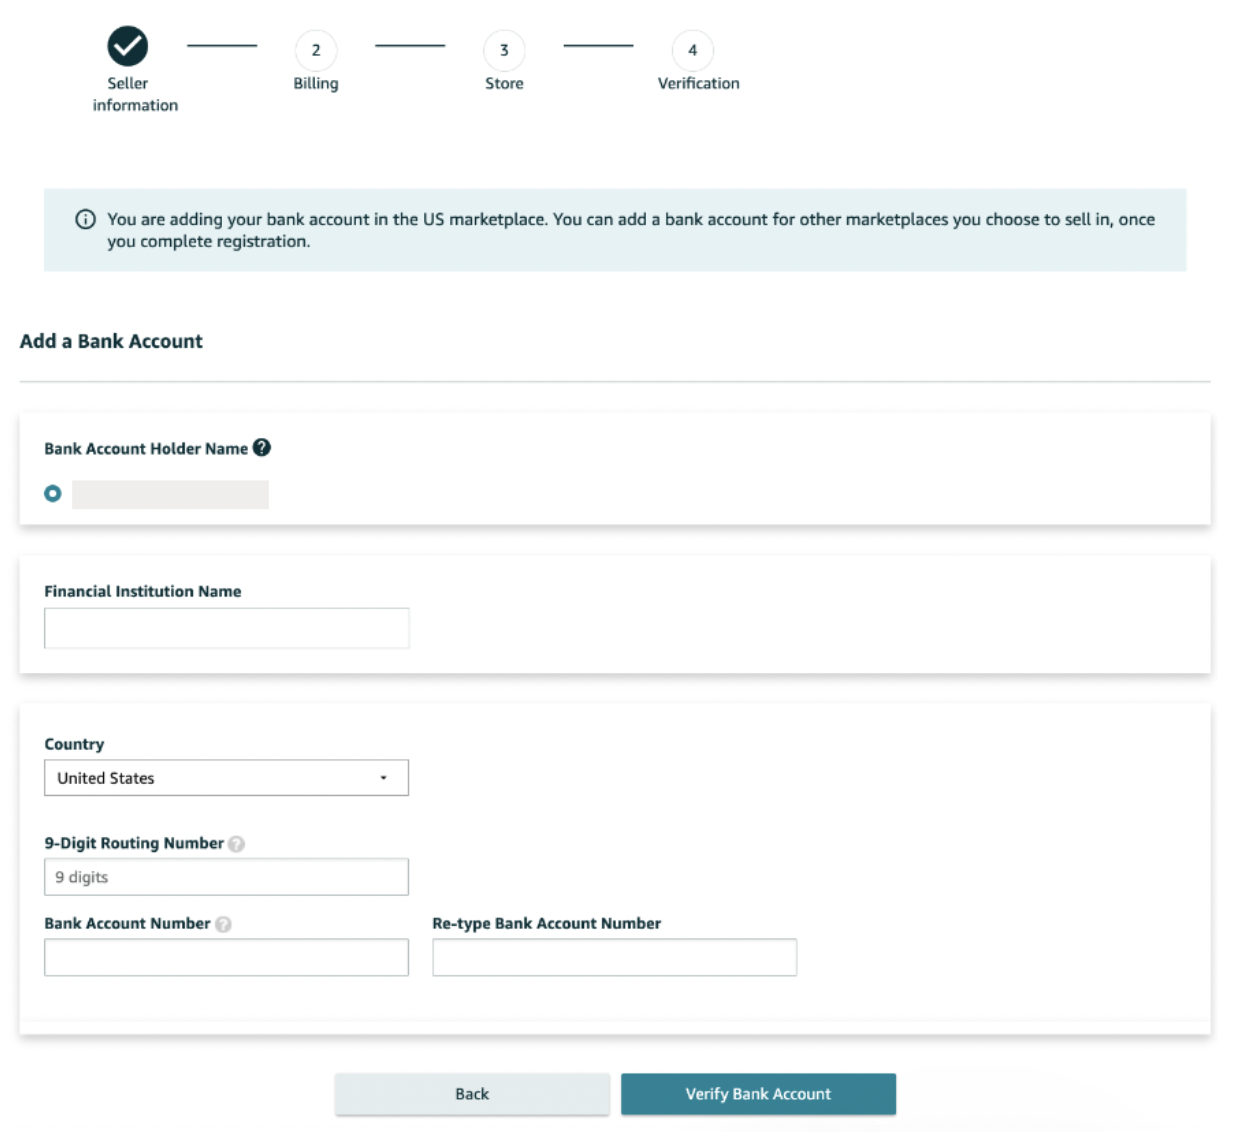
Now, it's time to enter your bank account and credit card details.
The credentials to enter bank account information are as follows:
- A valid bank account number
- The bank account must be in the name of the primary contact or business name provided to Amazon
- Either online banking credentials or a bank statement to verify your account
After entering these details, click Verify Bank Account.
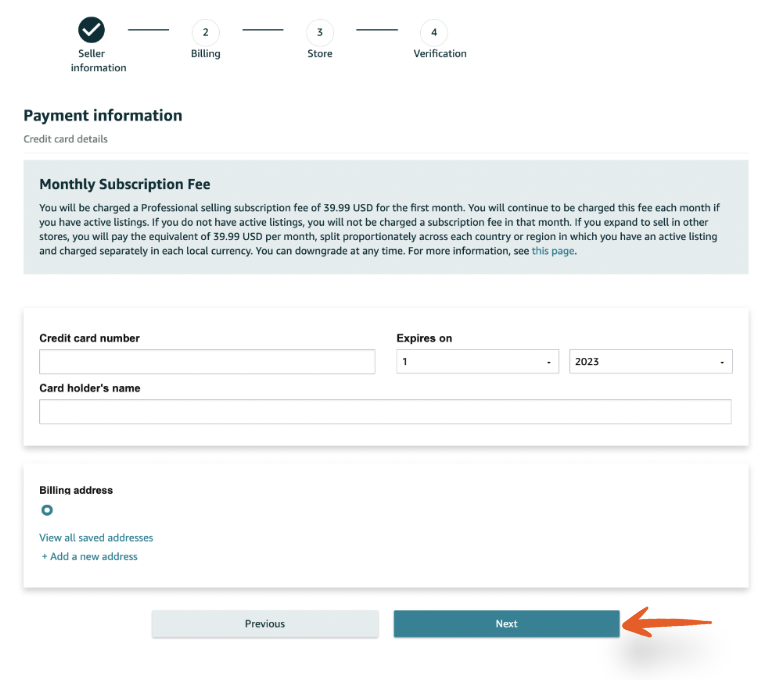
To enter credit card information, you must use a valid credit card number. Amazon will use this card to charge the Monthly Subscription Fee for your professional selling account. (Currently $39.99/month)
Click Next.
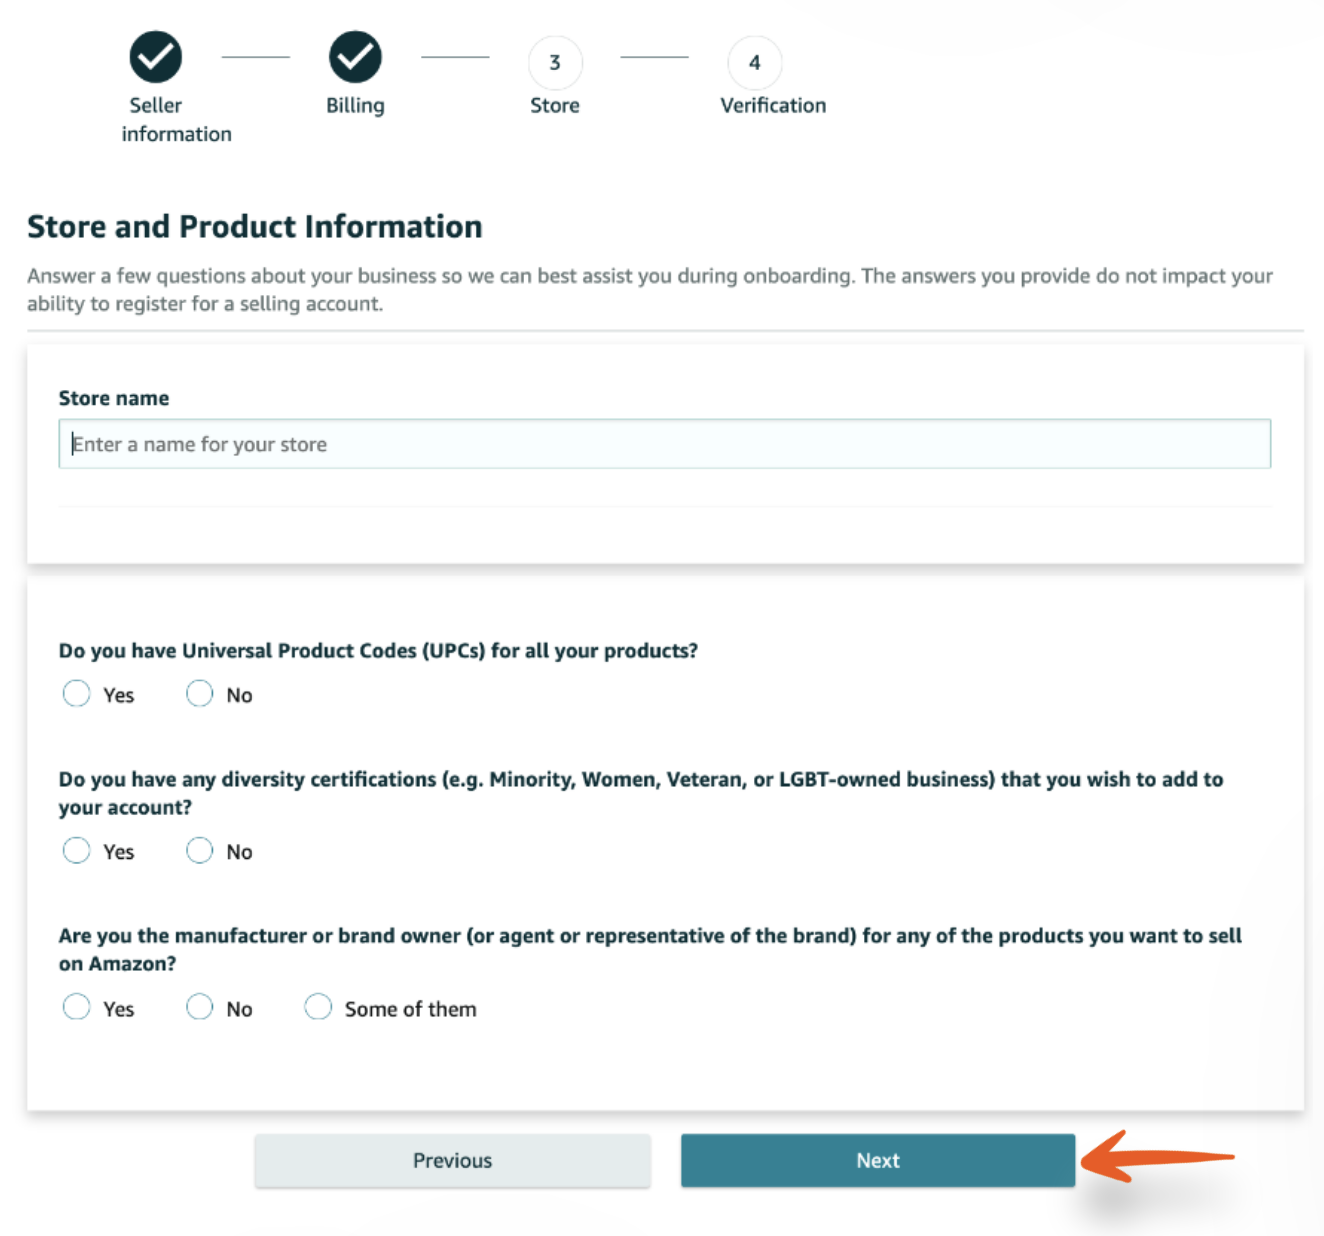
The next step is to enter your Amazon store name and answer a few questions about the products you'll sell. They'll ask the following:
- The name of your Amazon store
- Whether or not you have UPCs for your products (If you're selling your own unique products, you will need these)
- If you have any diversity certifications
- If you are the manufacturer or brand owner of the products you're selling. (If you click Yes, you'll be asked if you own a government-registered trademark for the products.)
Click Next.
As the final step, you'll be asked to verify your identity by uploading images of your passport or driver's license, and bank or credit card statement.
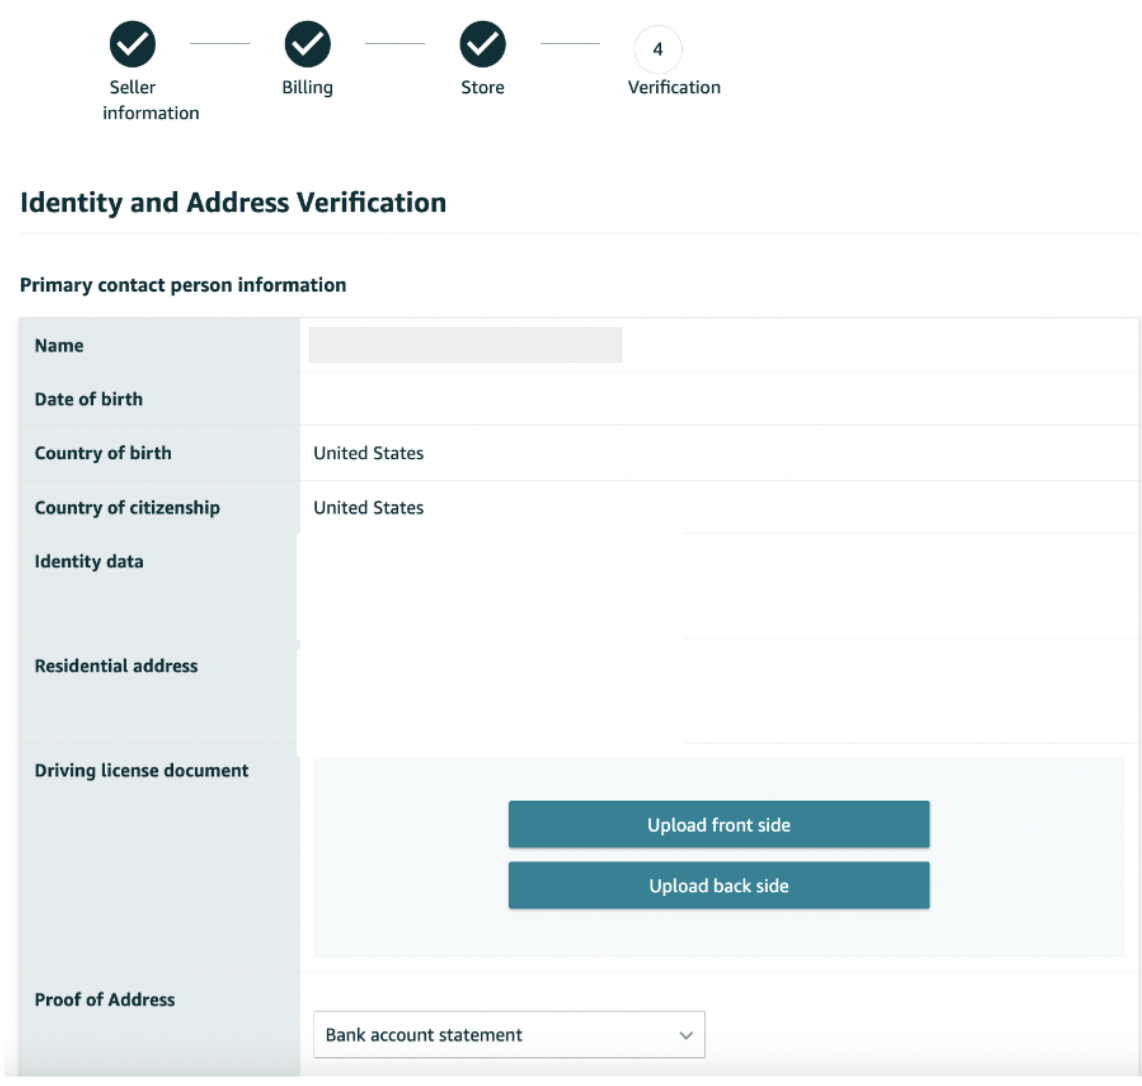
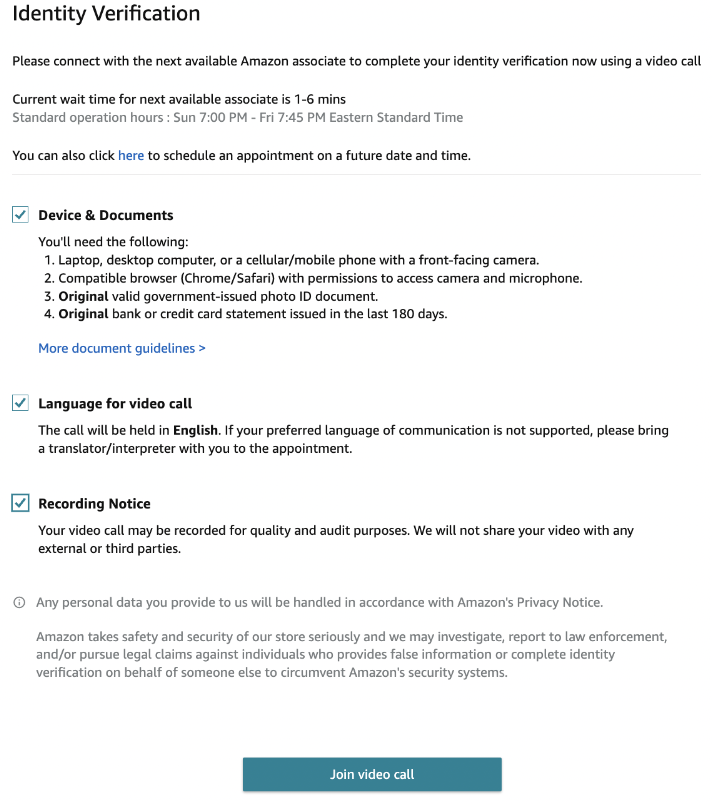
After submitting your documents, you must complete an Identity Verification via video call with an Amazon representative. During this call, the rep will review the information you provided and may ask any follow-up questions they have to ensure the accuracy and legitimacy of your application. This is now a standard procedure to protect both sellers and buyers on Amazon's platform.
If Amazon representatives are available when you submit your information, you can join a call right away or wait for the next available rep. You also have the option to schedule a call for a later time.
Once you're verified, your account will be approved, and you'll be all set to start your Amazon selling journey!