
Entering Buy Costs on the Inventory Page
In the world of e-commerce, tracking costs is essential for staying competitive and profitable. However, buy costs for the same product are not always consistent- factors like supplier price changes typically vary when restocking a product. On the Inventory page in Boxem, you can enter a fixed buy cost for a SKU or multiple buy costs if what you pay when restocking changes over time.
To update your buy costs, navigate to the Inventory page in Boxem by clicking Inventory from the left menu.

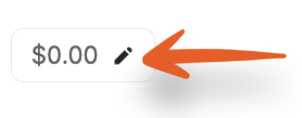
Locate the product you want to update and click on the pencil in the Buy cost field.
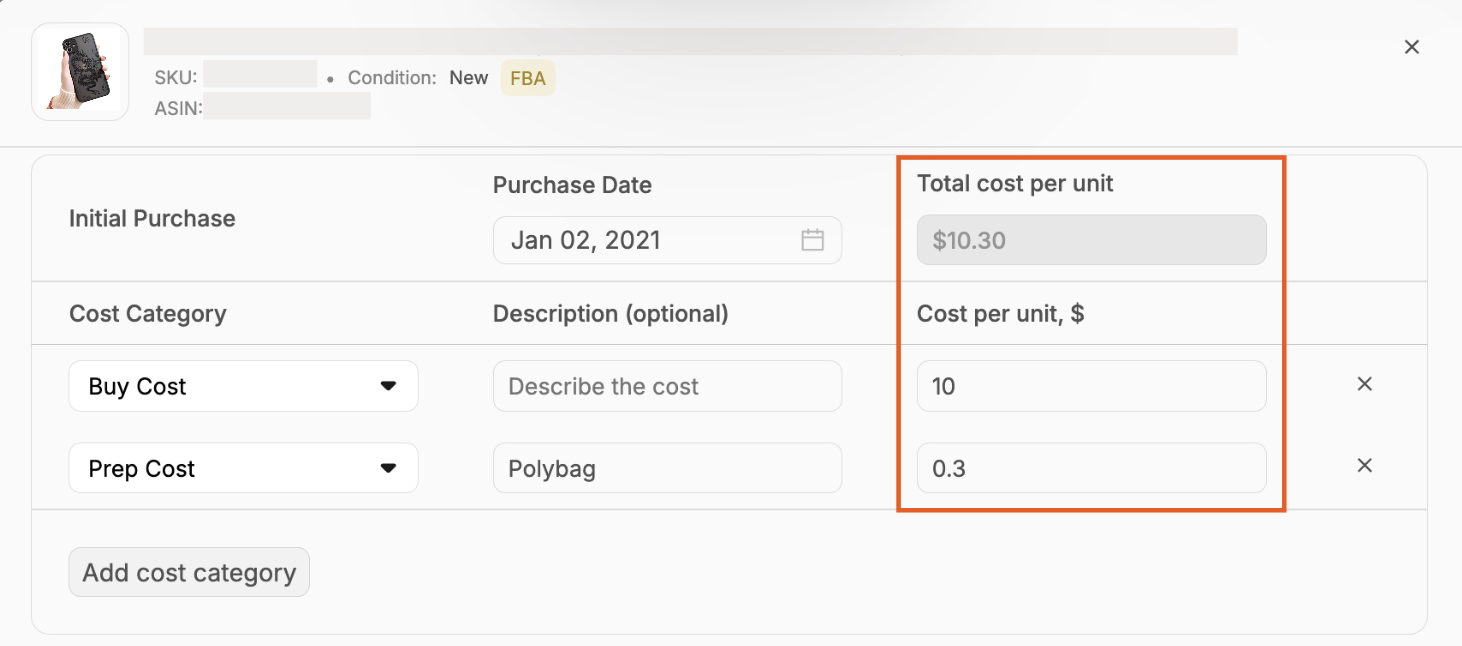
A modal will appear where you can enter or edit the Purchase Date and Buy Cost for the Initial Purchase, which refers to the first units of this SKU you you purchased to list on Amazon.
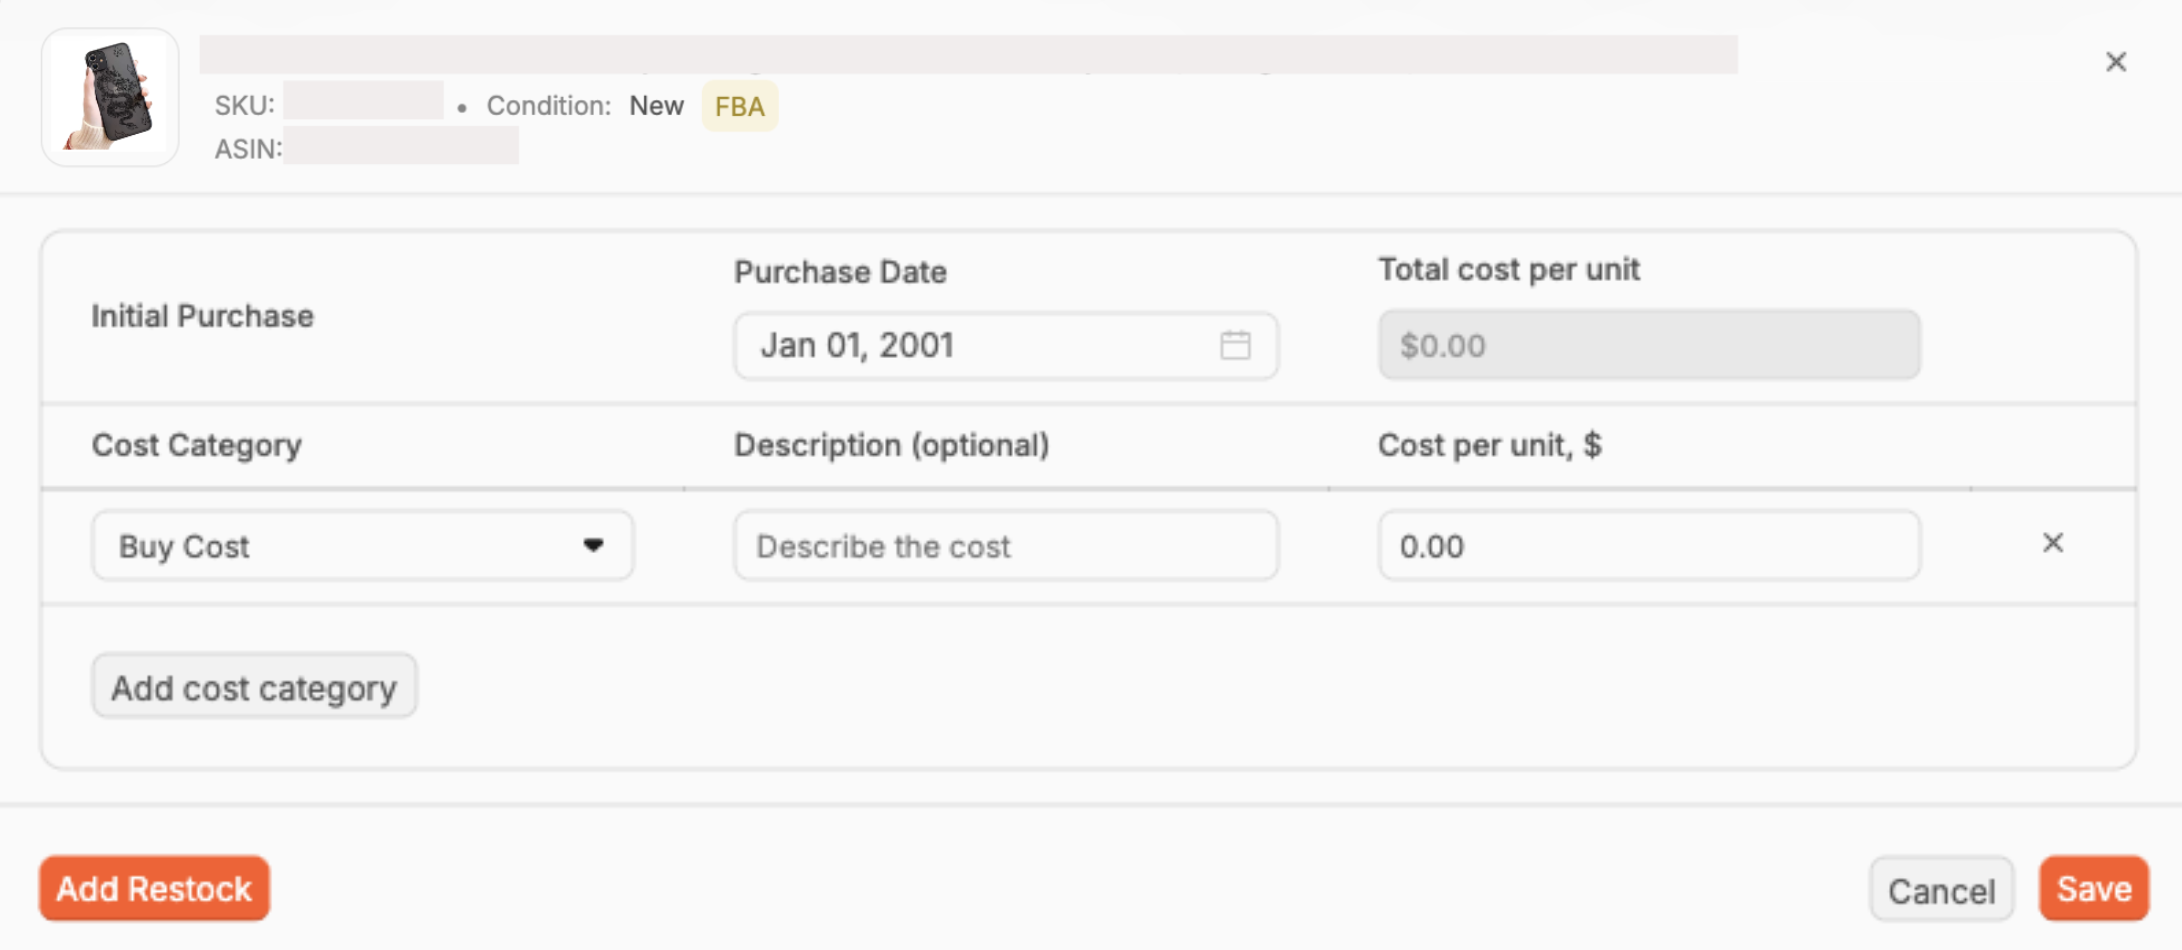
The Total cost per unit is not editable, as it is the sum of the different Cost Categories shown below it.
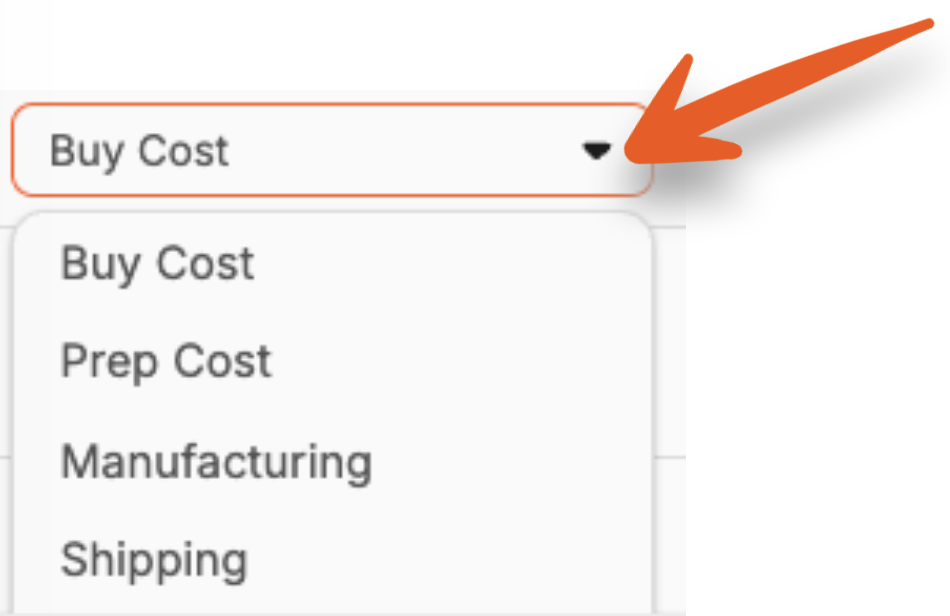
By default, the category will be Buy Cost, but you can change the category by clicking the field and selecting a different option or typing a new name.
Next, you can enter a Description of the cost. (This is optional.)
Lastly, enter the amount of the cost in the Cost per unit, $ field.

Click Add cost category to add an additional amount to the total the total cost per unit.
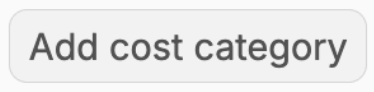
Choose or enter the category name and enter the rest of the details. If you need to delete a Cost Category, click the x next to it.

You'll see the Total cost per unit value update automatically as you enter the cost for each category you add.
If you restocked the SKU and want to track a different Buy Cost for this purchase, click Add Restock.

From here, enter the Purchase Date and cost information for this purchase.
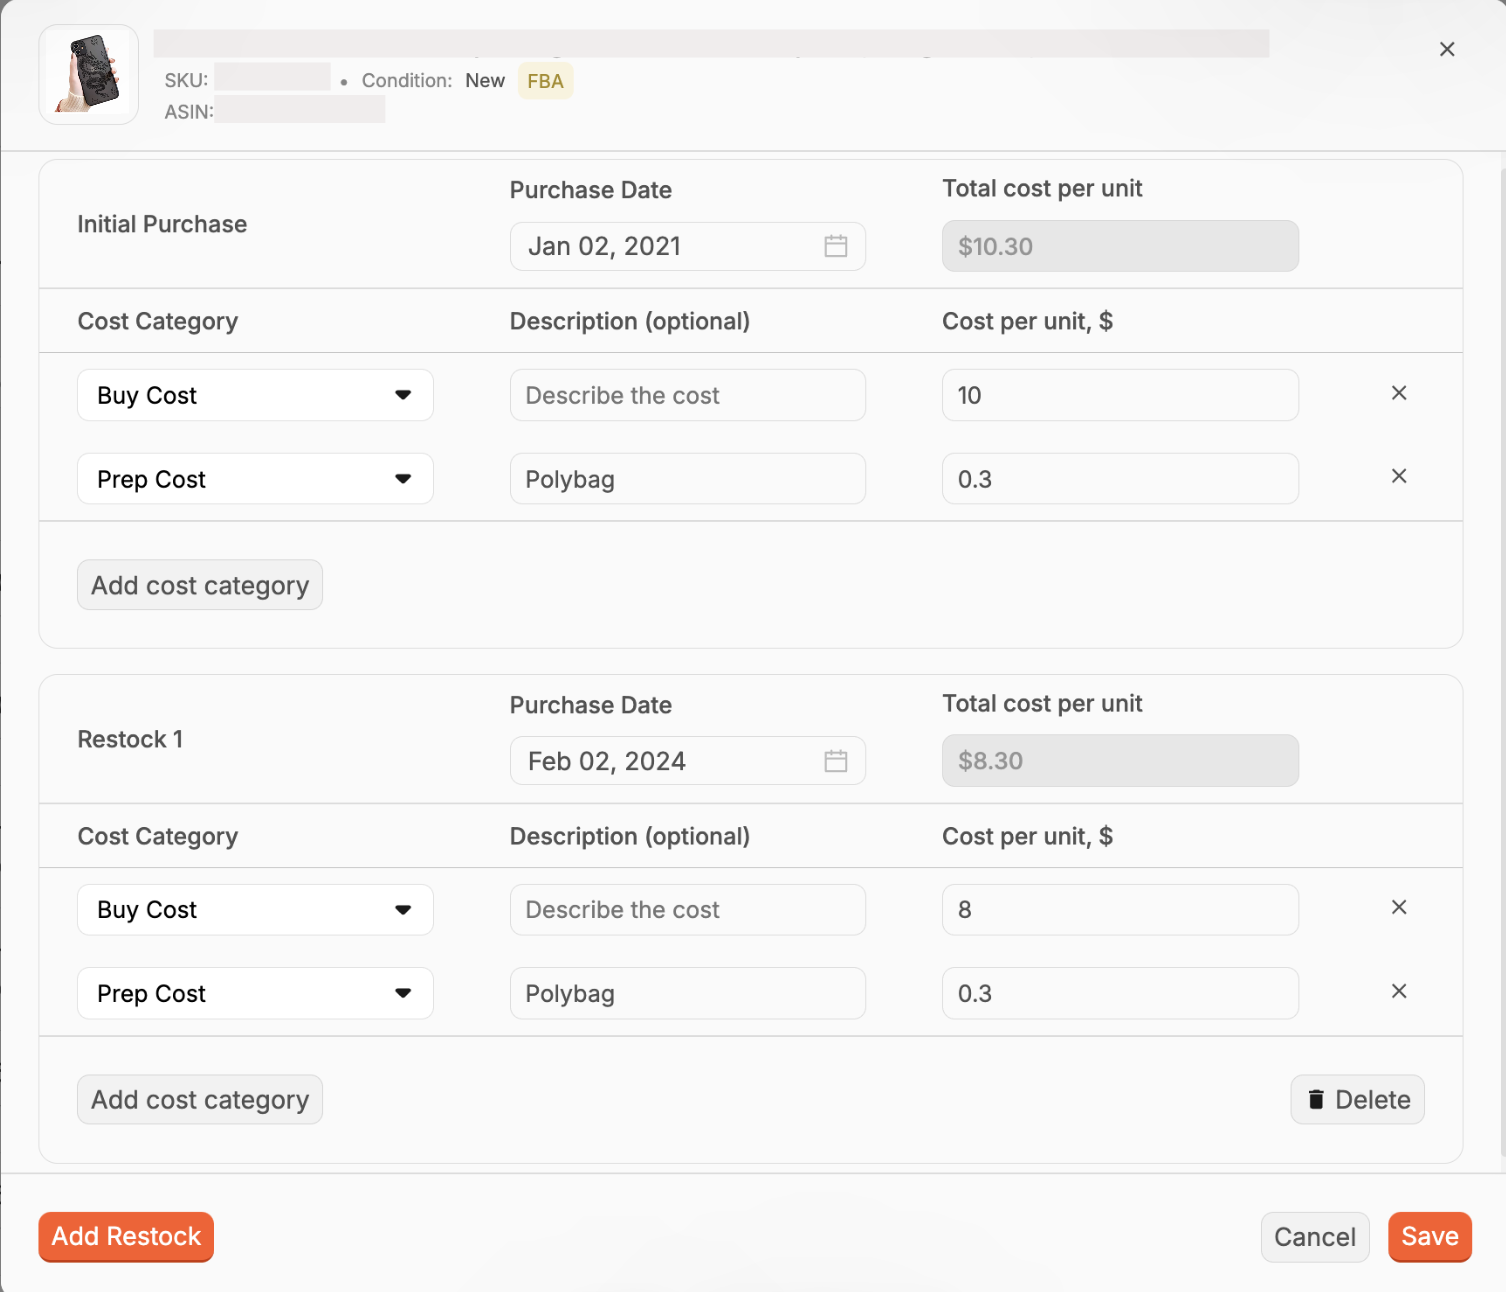
You can continue this process for any additional Restocks you'd like to track. If you need to delete a Restock all together, click the Delete button.
Once you've finished updating your Buy Costs, be sure to click Save.

The cost for the Initial Purchase will be applied to the sales of the SKU until the Purchased date of Restock 1. This will continue based on the Purchased Date entered for each added Restock.