Step 2: Prep & Boxem
In Step 2: Prep & Boxem, Amazon will determine the pack groups for our products, and we'll assign them to boxes accordingly.
The left side of the page shows a list of the pack groups and SKUs in each group. As you create boxes and assign SKUs to them, they will be displayed on the right.

Pack Groups
When determining pack groups, Amazon identifies similar products in size, weight, shape, and how they need to be packed. This helps make sure everything gets packaged and shipped efficiently and safely.
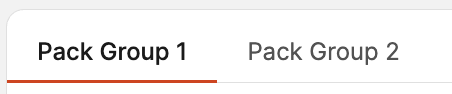
Depending on the types of products in your shipment, they may be split into different pack groups. Each pack group will have it's own tab in the display so box content can be entered for them seperately.
Note: SKUs from different pack groups cannot be packed together.
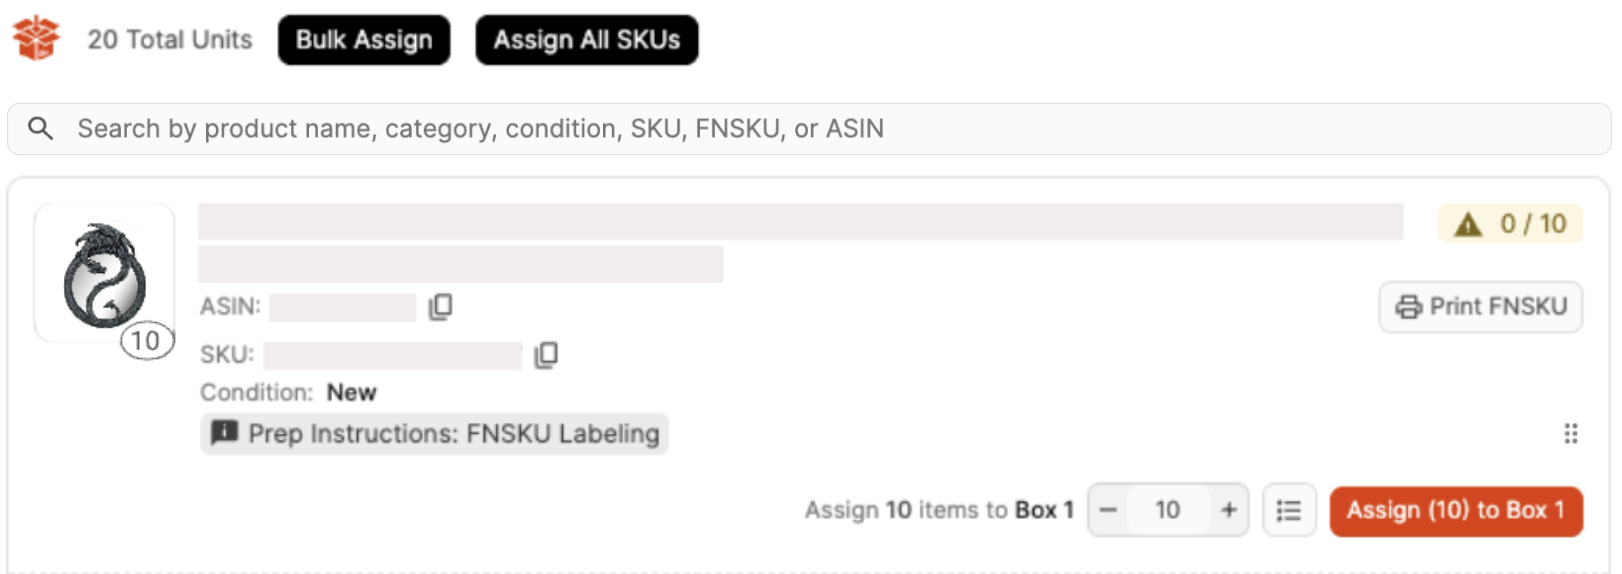
The total number of units for each pack group be displayed, along with each product's image, title, ASIN, SKU, Condition, and quantity.
You can use the search bar to find products in the pack group by name, category, condition, SKU, FNSKU, or ASIN.
Next to each product are buttons to Assign and Print FNSKU labels.
Prep instructions will display based on the prep category chosen when adding the products to the shipment. If you (the Seller) are the prep owner, you are responsible for following the instructions to prep the product before placing it into a box. Additional guidance on prep can be found here: Prep guidance
The number of units that need to be assigned will show and update as you add them to boxes.
Creating Boxes
For Pack Group 1, the first box is already created for you. If you need additional boxes, enter the number of boxes and click the Create new box(es) button.

If you tend to ship boxes that are the same dimensions and weight, you can set up and select box templates to automatically fill in your selected dimensions and weight details for you. These can be set up by clicking the Box Details button or when editing individidual boxes.
You can also create new boxes while assigning products, or create boxes in bulk by using the Bulk Assign button.
Assigning Products to Boxes
To assign a product to a box individually, click the box you want to assign it to, then click Assign next to the product.
If you don't want to assign the total quantity to the selected boxes, enter the number you'd like to assign before clicking Assign.

If you have multiple boxes selected, the Assign button will change to a Split button so the quantity can be evenly distrubuted between the boxes.

You can also click the list icon to open a modal with more tools to help assign the product to boxes.

From here, you have the option to assign them manually or split them evenly between boxes.


To assign units with less clicks, you can drag and drop products to boxes by clicking the dots and dragging the product to a box.
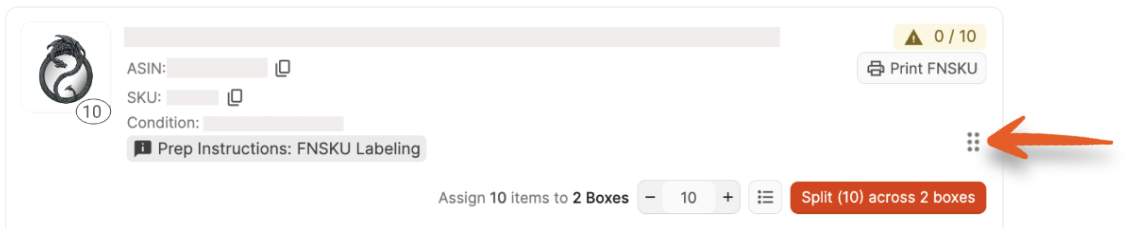
As you drag products and hover over a box, the box icon will jump to let you know it's selected.
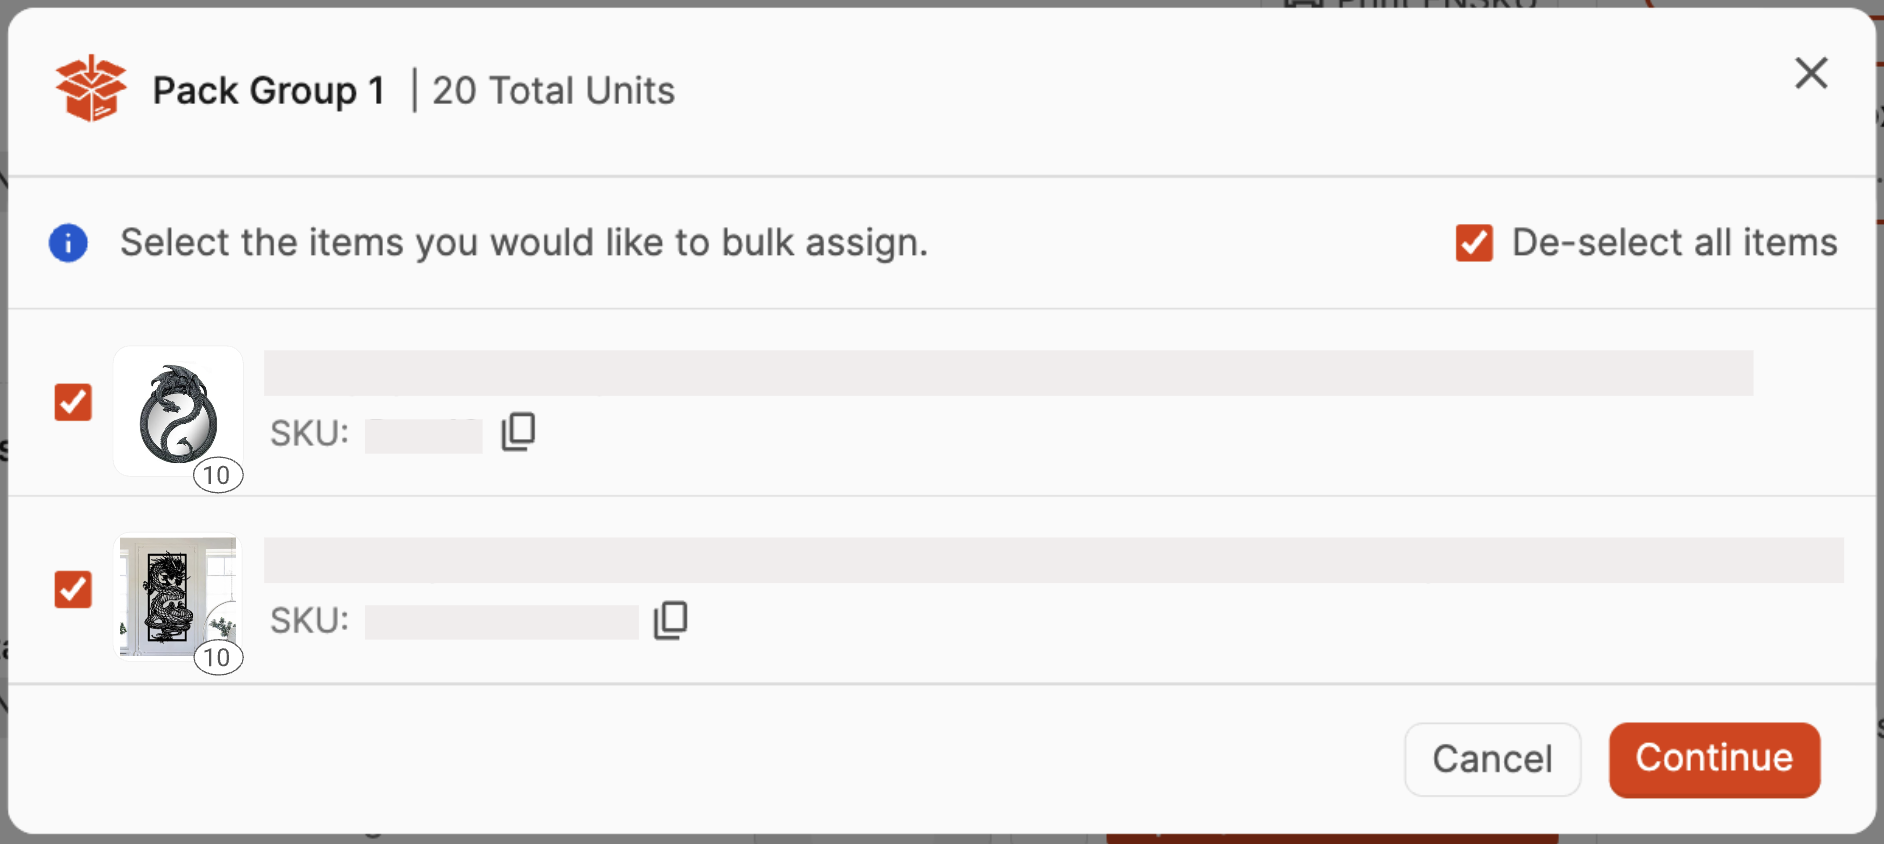
The Bulk Assign function allows you to assign the product to boxes as you create them and enter their dimensions and weight, making it an excellent option for case-packed products.

A modal will open displaying the products in the shipment. Select the products you'd like to bulk assign to boxes, then click Continue.
Next, enter the number of units, total number of boxes, and the dimensions and weight of the boxes.
If your boxes are different sizes, click the New Box Type button to enter these details.
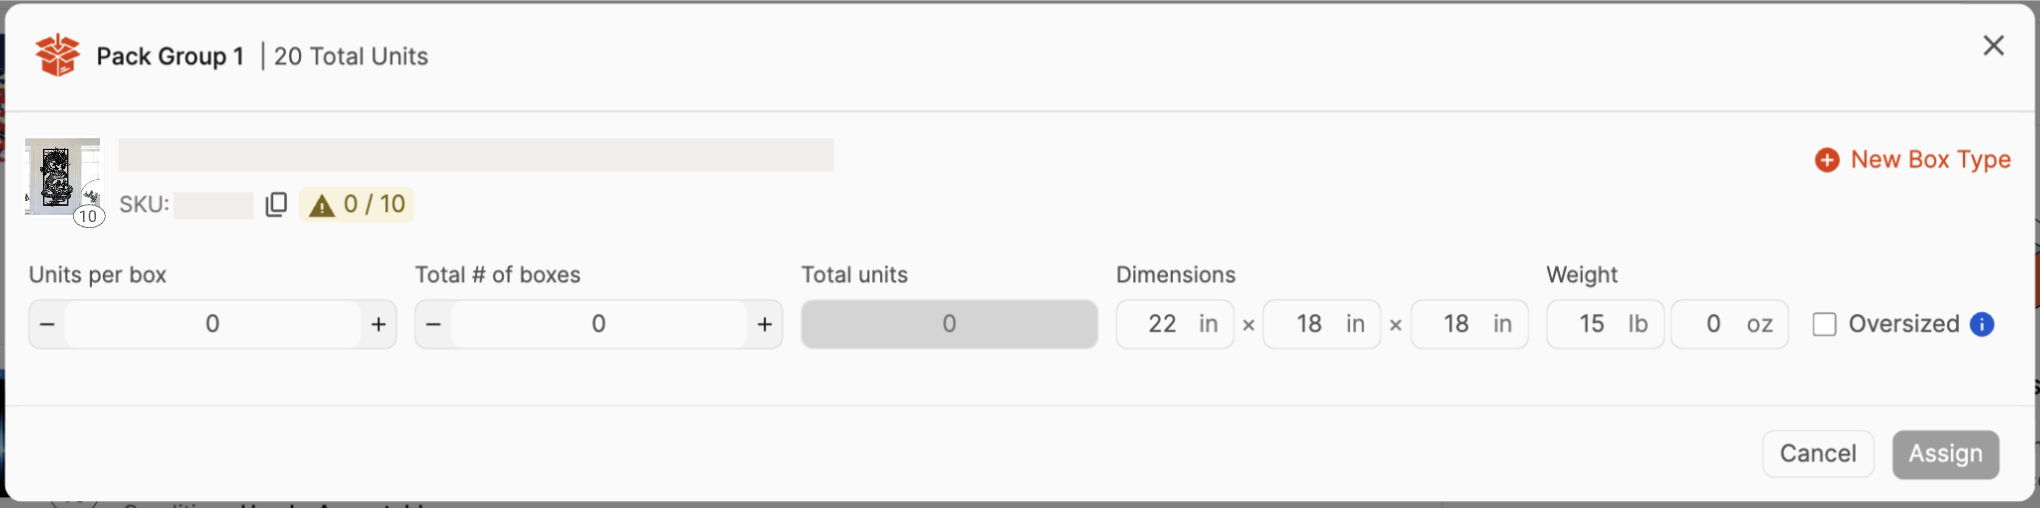
Once you click Assign, the boxes will be created accordingly with the product assigned in bulk.
The Assign All SKUs function will evenly distribute the products between selected boxes with just a few clicks.
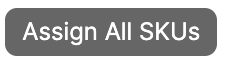
A modal will open displaying the products in the shipment. If you haven't selected boxes yet, choose which ones you'd like to assign the products to or create a new box.

Next, select the products you'd like to bulk assign to boxes and adjust the quantity if needed.
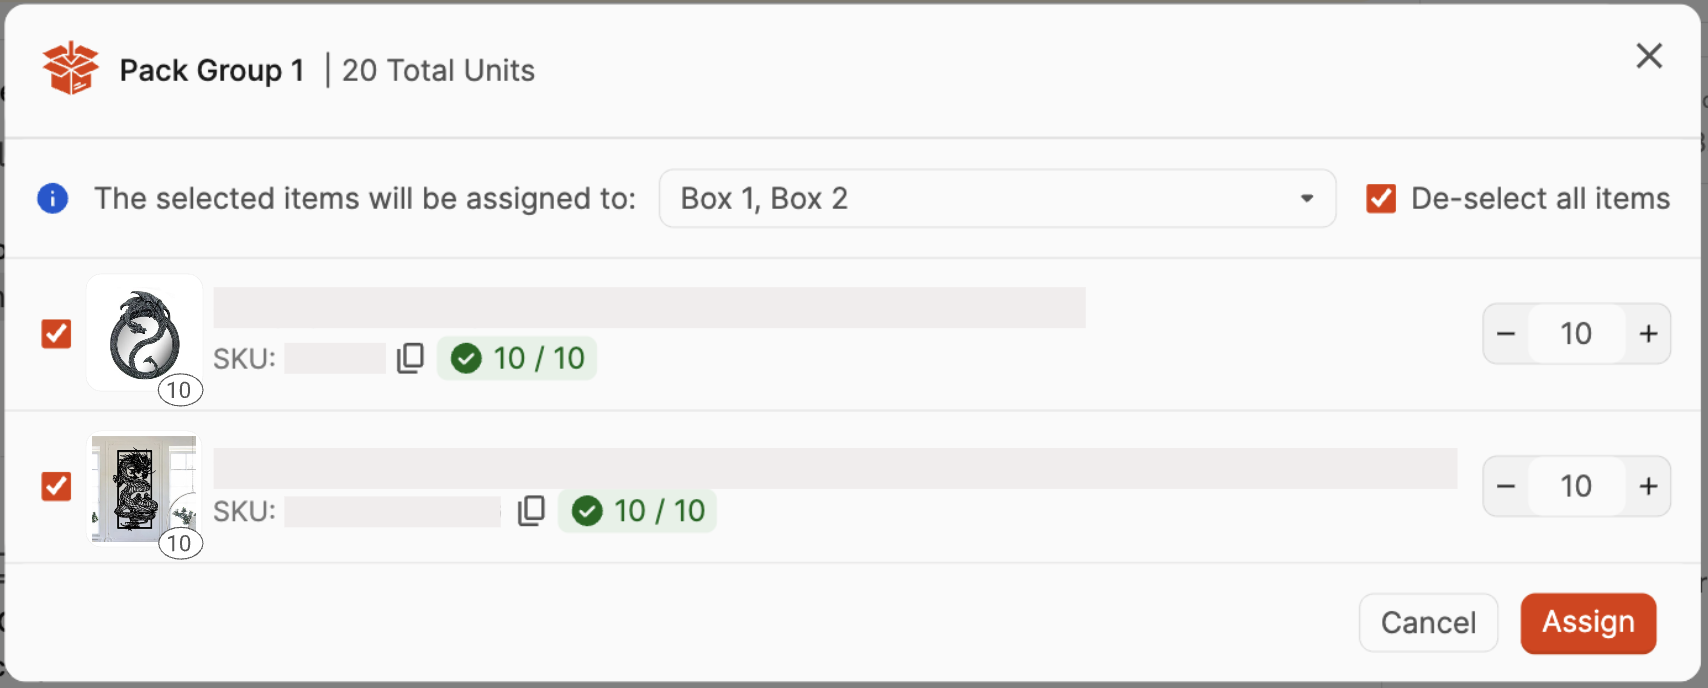
Once you click Assign, the selected products will be evenly distributed between the selected boxes.
Viewing/Editing Boxes
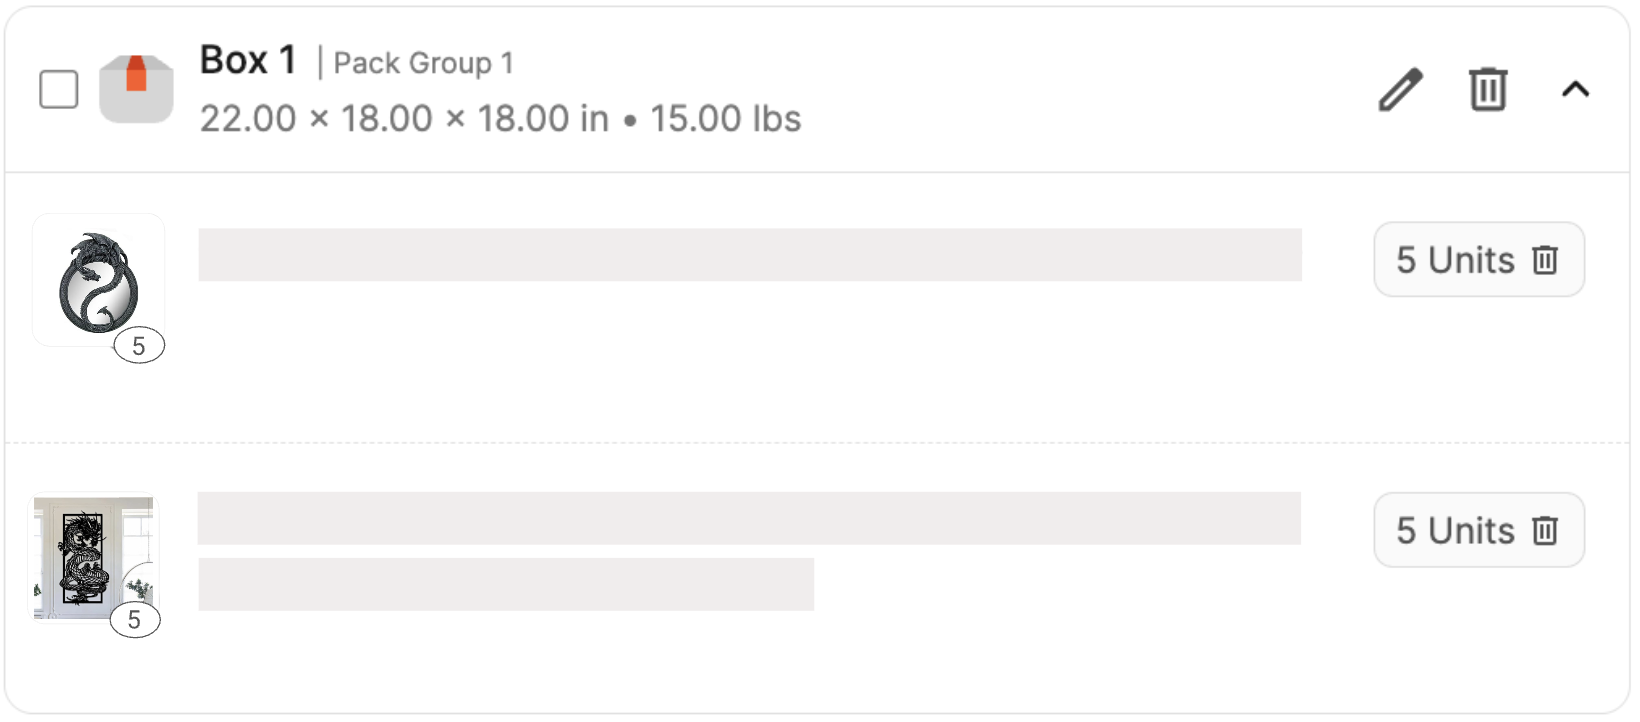
On the right side of the screen, you can view the contents of each box and make any needed changes.
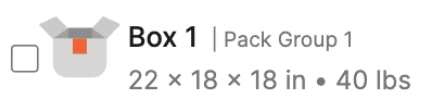
The name, dimensions, and list of products assigned to each box will be displayed.
If dimensions and weight need to be entered or updated for an individual box, click the pencil icon to enter them.

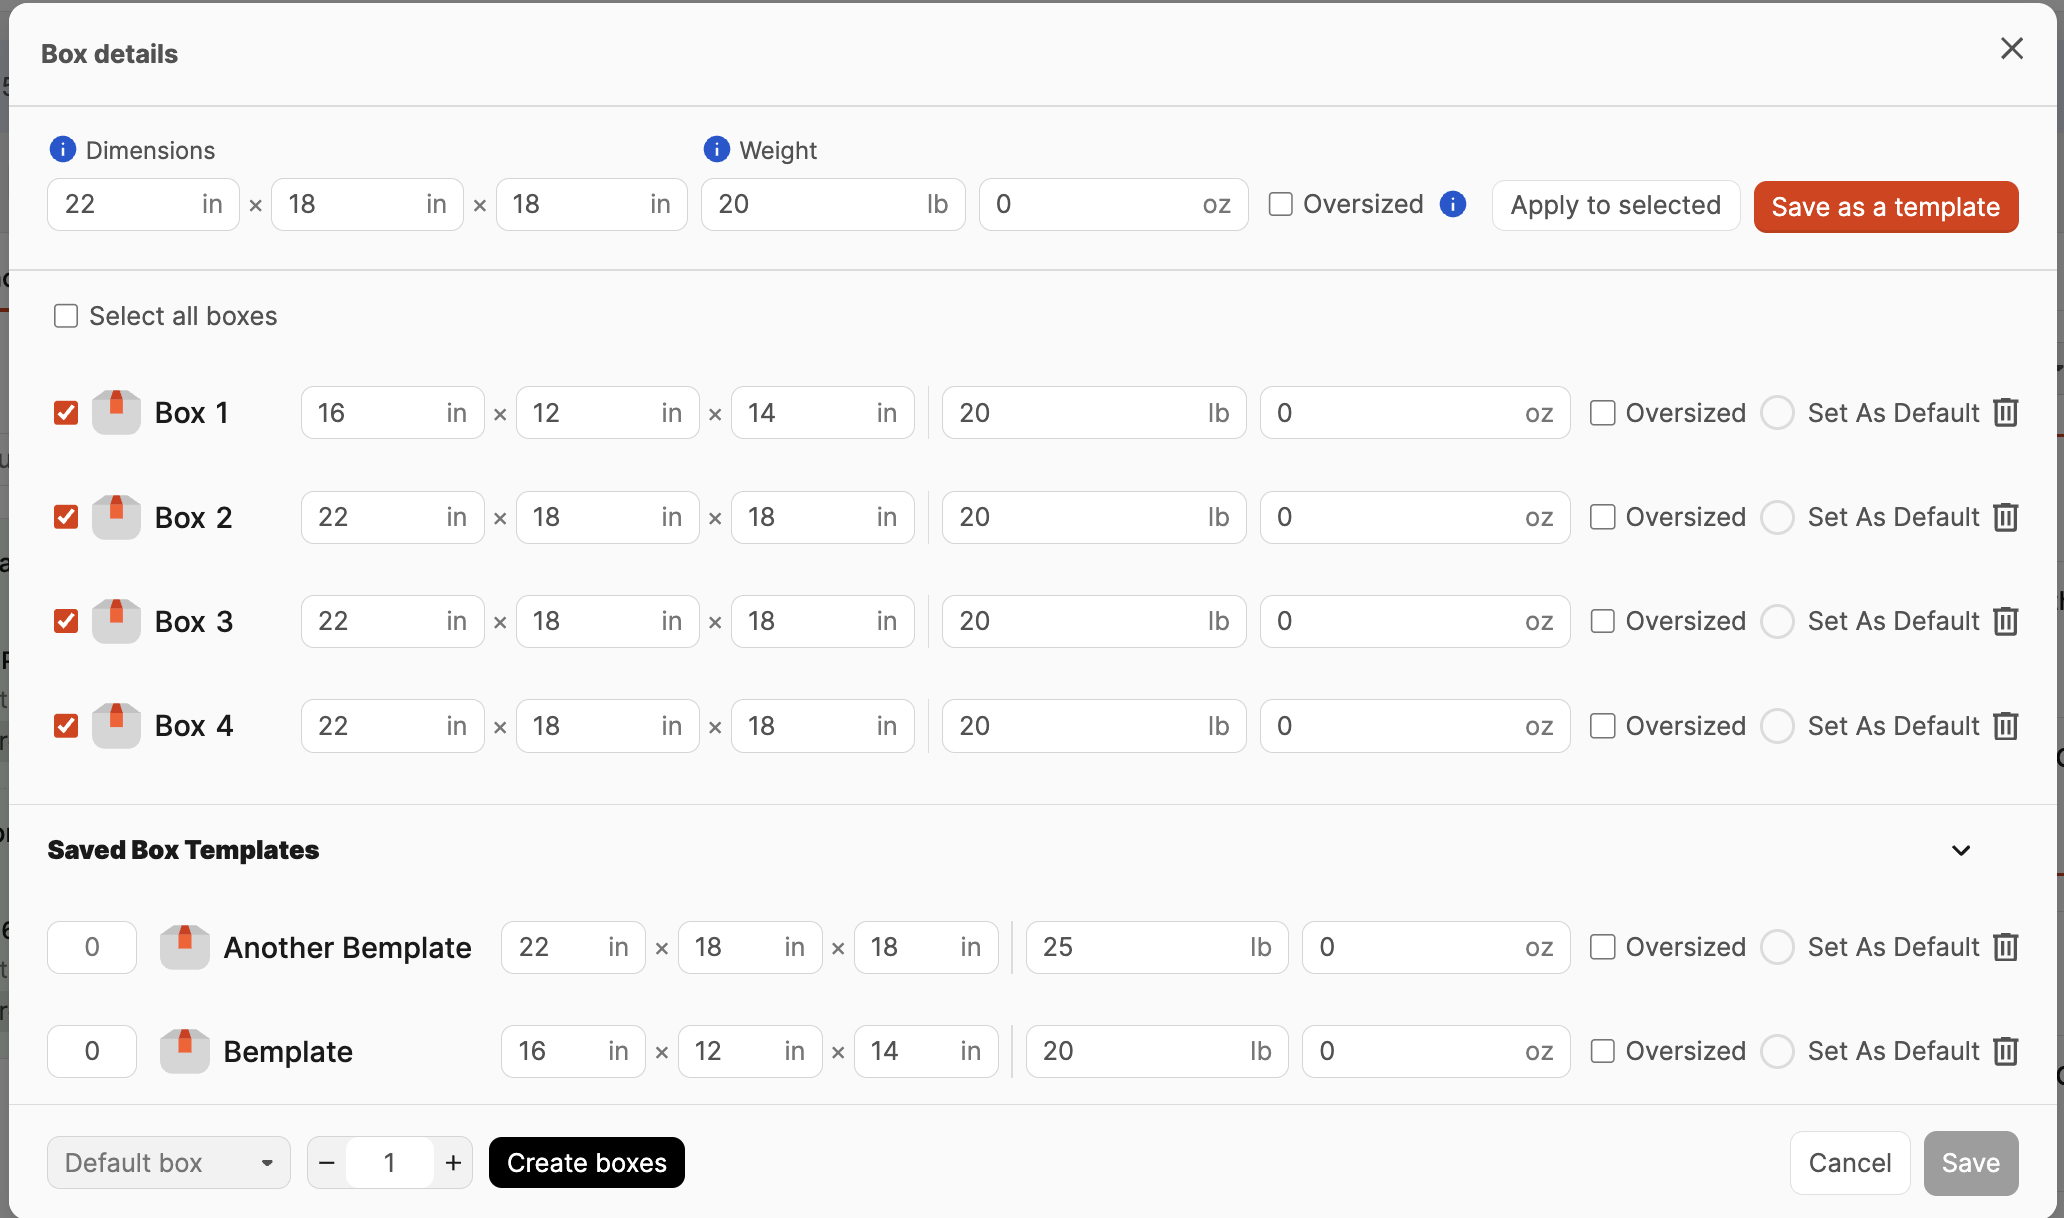
If you need to update dimensions and weight for multiple boxes, you can do this in bulk by clicking Box Details on the left side of the page.
A modal will open where you can enter dimensions/weight for all of the boxes.
Select the boxes you want to update and click Apply to selected to update boxes in bulk.
To save the details entered as new box template, click Save as a template. Existing box templates can be viewed and edited in the Saved Box Templates area.
To use a template as the default for new boxes, select Set As Default next to it.
Be sure to click the Save button after making any changes.
If you need to delete a box, click the trashcan icon.
Note: Deleting boxes may cause your box names to be out of order. This can lead to issues when applying box labels, so we recommend changing your box assignments over deleting boxes when possible.

To remove a product from a box, locate the SKU and click the trashcan icon next to the number of units.

Submitting Box Content and Pack Groups
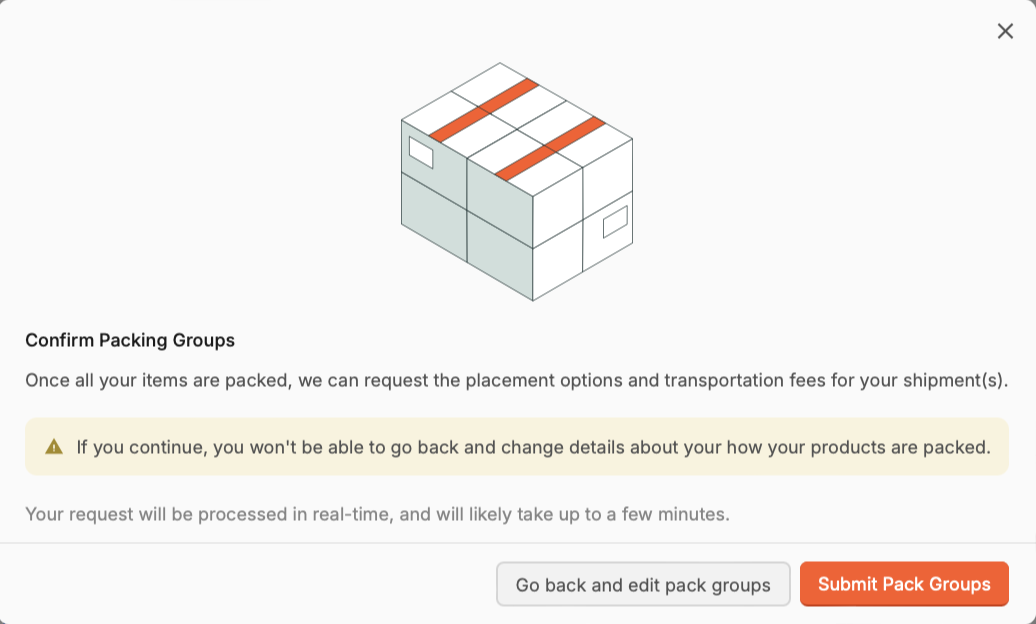
After you've assigned all of the SKUs in each pack group to a box and entered the dimensions and weights for the boxes, click Continue to send Amazon the shipment details. Boxem will request the placement options and associated transportation fees for the shipment(s).
You'll see a message letting you know that box assignments cannot be changed once you move to the next step. If you're happy with your boxes, click Submit Pack Groups to move forward to Step 3: Confirm Shipments.
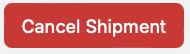
If you decide you do not want to proceed with shipping the products, click Cancel Shipment. From there, you can create a new shipment and relist the products when you're ready.