Take advantage of our launch offer and lock in a great deal! Click here to sign up now 🚀

Thank you! Your submission has been received!
Oops! Something went wrong while submitting the form.

2D Barcodes

With this option, Boxem will incorporate 2D barcodes containing your box content information on your FBA box labels. This streamlined process allows Amazon to scan the 2D barcodes upon arrival at the fulfillment center, efficiently identifying each box's contents.

If you're new to using 2D barcodes for box content, check out Amazon's article, which explains how it works: 2D barcodes for box content information

You'll also need to ensure the 2D barcode setting is enabled within your account in Seller Central. For steps to help with this, check out this article: How To Enable 2D Barcodes

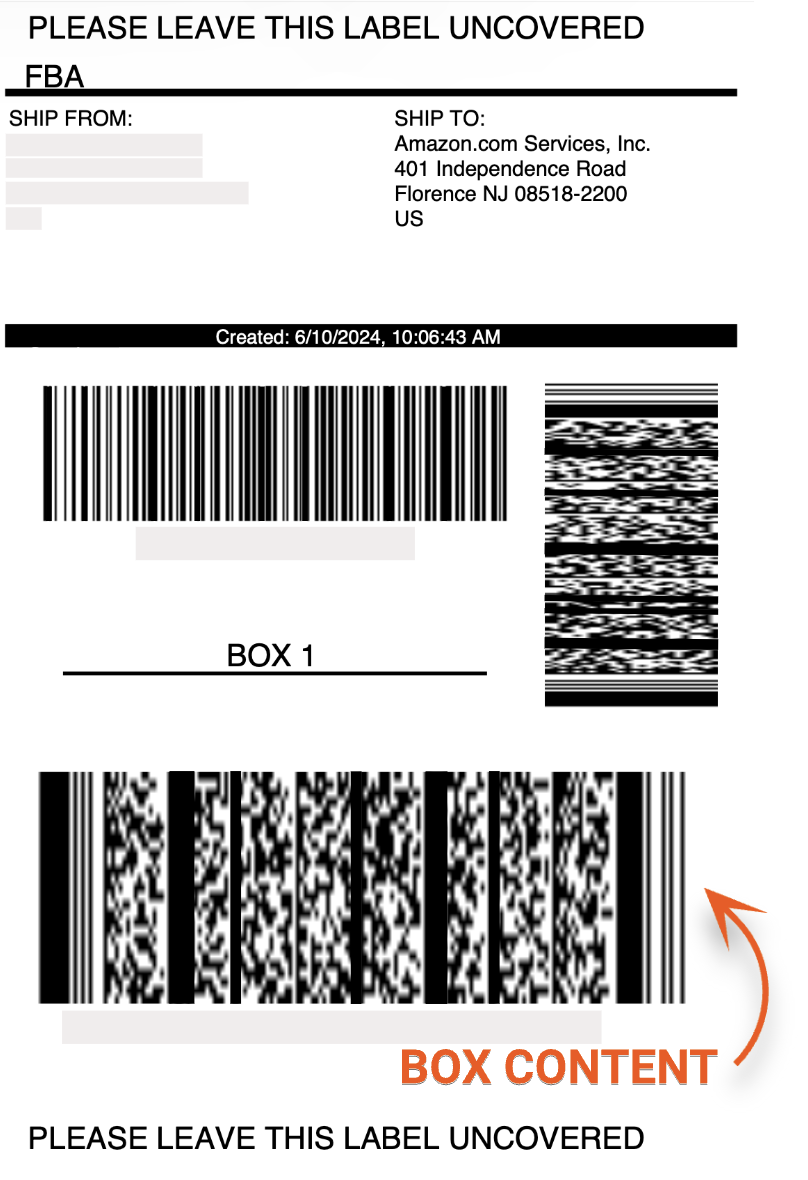
Once that's been set, your FBA Box labels will look something like this when using the 2D barcode box content method in Boxem:

Unified FBA box and box content label

But first, you'll need to assign your products to boxes and enter their dimensions and weights. Let's get started!

You'll find the products in the shipment listed on the left side of the page. As you create boxes and assign the products to them, they will be displayed on the right.

If you're working on an LTL shipment, you can print labels for your pallets by clicking the Print Pallet Labels button at the top right corner.

Enter the number of pallets you want to ship and click Print Labels.

If you need to adjust your print settings before starting or while assigning products to boxes, click the Printer Settings button.

Products


In the Products section, you'll see each product's image, title, ASIN, SKU, Condition, and quantity.

Next to each product are buttons to Assign, Bulk Assign, and Print FNSKU labels.

The number of units that need to be assigned will show and update as you add them to boxes.

You can also filter the products to show only those already assigned to boxes or those still needing assignments.

Creating Boxes


Creating new boxes is a flexible process that can be tailored to your workflow. Let's explore the different methods available!

Create First Box


To create your first box, you can click Create first box on the right side of the page to get started.

If you need additional boxes, enter the number of boxes and click the Create new box(es) button.

Assign Button

You can create boxes as you assign a product to them by entering the number of boxes you need and clicking the Create new box(es) button.

Bulk Assign Button

If you are shipping case-packed products or have multiple boxes with the same dimensions and weight, you can create bulk boxes for a product by clicking the Bulk Assign button.

Enter the number of units per box and the total number of boxes, then enter the dimensions and weight. If you have boxes with different dimensions for the product, click + Add a box to enter those details. If a box is oversized, click the Oversized checkbox.

Dimensions & Weight Button


If several of your boxes have the same dimensions, you can create them in bulk by clicking the Dimensions & Weight button at the top of the page.

Enter the number of boxes you need and click Create new boxes.

If all the boxes have the exact same dimensions and weight, enter these details at the top and click Apply to all.

Or, to apply the measurements only to certain boxes, click De-select all boxes and select the boxes you want them applied to.

Assigning Products to Boxes


Boxem offers you the flexibility to assign products to boxes according to your preference. Whether you prefer to assign products individually or in bulk, we've got you covered.

Assign Button

To assign a product to boxes individually, click Assign next to the product.

From here, you have the option to assign them manually or split them evenly between boxes.

Assign Manually
The number of units that need box assignments will be displayed along with a list of the boxes you created.

Locate the box to which you want to assign the product and enter the number of units in the quantity field. Repeat this until all the units have been assigned to a box.

If you still need to create box(es), enter the number of the boxes you need and click Create new box(es).

Split Evenly
The number of units that need box assignments will be displayed along with a list of the boxes you created.

In the Split Quantity field, enter the number of units you want to assign to each box, then click Split across X boxes. Boxem will do the work for you and assign the units evenly between your boxes.

Bulk Assign Button


The Bulk Assign function allows you to assign the product to boxes as you create and enter their dimensions and weight, making it an excellent option for case-packed shipments.

The number of units that need box assignments will be displayed. Enter the units per box and the total number of boxes, then enter the dimensions and weight. If you have boxes with different dimensions for the product, click + Add a box to enter those details. If a box is oversized, click the Oversized checkbox.

Viewing/Editing Boxes


On the left side of the screen, you can view the contents of each box and make any needed changes.

The name, dimensions, and list of products assigned to each box will be displayed.

If dimensions and weight need to be entered for an individual box, click Set Dimensions and weight to enter them.

If you still need to enter dimensions and weight for multiple boxes, you can do this in bulk by clicking Dimensions & Weight at the top of the page.

If you enabled the option to Print FBA box labels as you Prep & Boxem when creating the shipment, you can print your box labels by clicking each box's Print FBA Box Label button. (If not, you'll print these during the next step.)

To remove a product from a box, click the trashcan icon next to it.

You can also remove products by clicking the box assignment tag in the Products list.

Clicking the three vertical ellipses next to a box name will open a menu with the following options:

  • Edit Dimensions and weight
  • View Products
  • Duplicate
  • Delete Box


Note: Deleting boxes may cause your box names to be out of order. This can lead to issues when applying box labels, so we recommend changing your box assignments over deleting boxes when possible.

Click the arrow next to the box name to hide or show the list of products in that box.

After you've assigned all of the products in your shipment to a box and entered the dimensions and weights for the boxes, click Continue to send Amazon the shipment details.

Once done, you'll move on to Step 4: Review & Ship.