
The Truth About Getting Ungated on Amazon

1
min read
March 18, 2026
We’ve all been there. You’re scanning a shelf or digging through a site, you find a product that looks like a total home run, and then, bam. You try to add it to your shipment and see that dreaded "Apply to Sell" button. You’re gated.
It feels like a wall standing between you and your profit. In the old days, random services would try to charge you $2,000+ just to teach you the basics. But here’s the reality: you don't need a pricey course. You just need a simple workflow.
Today, we’re breaking down how to stop fearing gated items and start building a wall of approvals so you can get your money back into your pocket faster.
Why Gating Actually Helps You
Before you get frustrated, remember that the opportunity of selling on Amazon is a lot more valuable because of these hurdles. A few years ago, the platform was flooded with counterfeiters. It was a race to the bottom because legitimate sellers couldn't compete with fakes.
Amazon put these gates in place to keep the riff-raff out. It feels annoying now, but once you’re in, it’s a protective moat around your business from counterfeit sellers.
The Shortcut: The Bulk Ungating Button
If you’re still manually checking every single brand to see if you can sell it, you’re wasting hours of sourcing time. There is a way to crack the code and get approved for hundreds of brands at once without even uploading an invoice.
Using the Boxem Bulk Ungating tool, you can import a list of ASINs or use the suggested list of 750 brands. It will apply for up to five brands per second when you run this scan, and automatically reports the brands that were able to be automatically un-gated for free.
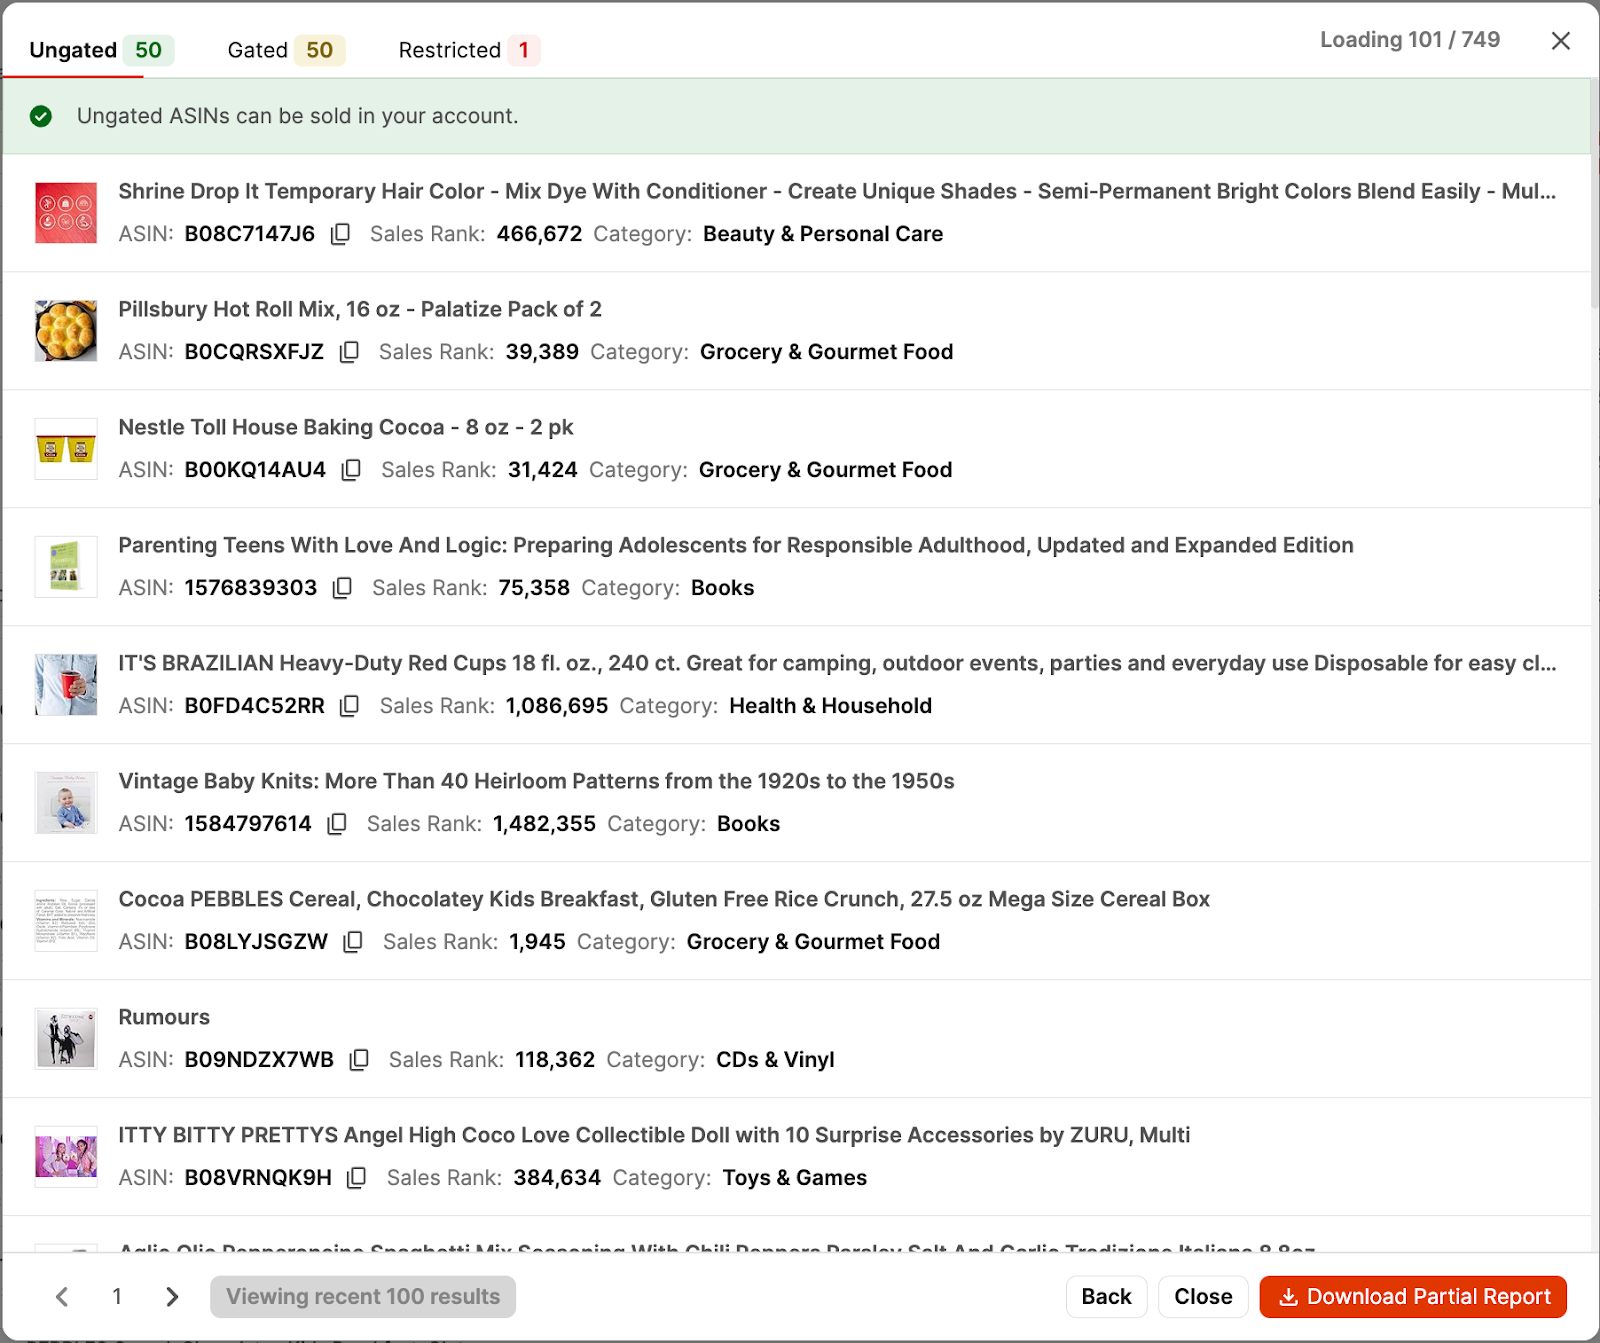
Boxem doesn’t just show you what’s already ungated; Boxem also attempts to unlock these brands for you.
The Real Difference: Manual vs. Bulk
How to Turn Approvals into Cash
Once you have your list of auto-approved brands, you need to find the inventory. This is where reverse sourcing comes in.
Instead of wandering aimlessly, look up an ASIN from one of your newly ungated brands on Amazon. Look at the other sellers on that listing. If they are selling one brand you’re approved in, they’re likely selling five others that are beginner-friendly. Click their storefront, filter by your approved brands, and see what they’re selling.
When Auto-Ungate Fails: Use Invoices
Sometimes, Amazon won't let you in for free. They want proof. If you're gated in a big category like Beauty or a brand like Burt's Bees, you need an invoice.
You don't need a brand direct connection for this. You can use big retailers like Target, Walmart, or Walgreens. Here is the play:
- Find a small item from the brand or legitimate retailer/wholesaler
- Buy the units Amazon asks for on the application
- Ensure your shipping/billing address matches your Seller Central info exactly.
- Download the order confirmation as a PDF and rename it something clear, like "BurtsBees_Invoice_March2026."
What to do if you get a "No"
It is completely normal to get declined. Don't take it personally. Sometimes the system just needs to see the info in a different way. If they deny your PDF, try this sequence:
- Round 1: Just resubmit the PDF, but change the filename so the bot treats it as new info.
- Round 2: Attach the retailer's shipping tracking number email to the PDF.
- Round 3: Attach the delivery confirmation email.
- Round 4: Take a physical photo of the items next to the packing slip that came in the box.
Just because you have to apply to sell a product doesn't mean you can't sell it.
AND - it’s completely normal to have to submit multiple times, even if you are uploading the right thing. Amazon’s automated systems are far from perfect.
Stop Guessing and Start Growing
The check-in lag at Amazon warehouses is long enough; don't let the ungating lag slow you down, too. By using Boxem to scan for easy wins, you can start selling products as soon as today while you get ungated in more opportunities that are locked off for now.
Interested in a more in-depth explanation on the auto-ungating process? Check out the complete guide on YouTube, available to watch for free:
Subscribe to our Weekly Newsletter
No spam, notifications only about new products, updates.


.png)

Get Started Today,
Ship Smarter with Boxem
Boxem streamlines all operations so you can focus on what truly matters.
.png)
